Sauces & Condiments
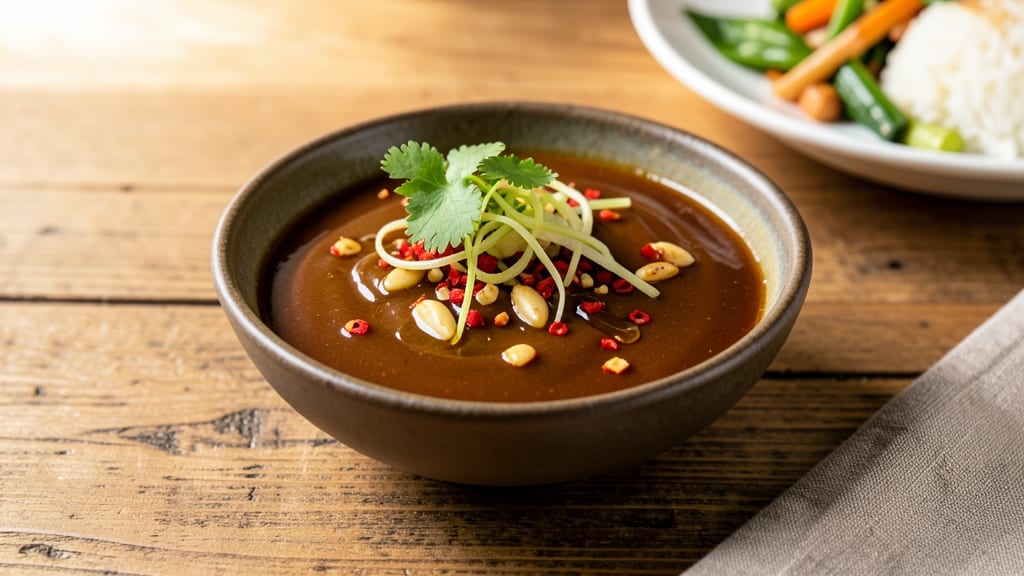
This Asian sticky sauce recipe transforms ordinary stir-fries into restaurant-worthy masterpieces with its perfect balance of sweet, spicy, and umami. The secret lies in simmering soy sauce, honey, garlic, and ginger until it thickens into a glossy, clinging sauce that caramelizes beautifully.
I developed this after years of testing—it's the one sauce that always elevates dishes without overpowering them.
The magic happens during the reduction stage, where the sauce develops deep layers of flavor while maintaining that signature sticky consistency.
With just 10 minutes of active time and 5 simple ingredients, you'll have a sauce that works as a glaze for grilled meats, a marinade for tofu, or a dipping sauce for spring rolls.
The balance of sweetness from honey and heat from chili flakes creates an addictive flavor profile that's impossible to resist.
What makes this sauce truly versatile is its ability to adapt to any dish while keeping its signature glossy finish. Whether you're tossing it with noodles, brushing it on skewers, or serving it as a dipping sauce, the sauce clings perfectly without making dishes soggy.
The aroma alone will have everyone asking for seconds—it's that good. Best of all, it keeps well in the fridge for up to 2 weeks, making it perfect for meal prep.
This isn't just another soy sauce glaze—it's a flavor multiplier that turns simple ingredients into something extraordinary. The key is patience during the reduction; don't rush it. Let the sauce bubble away until it reaches that perfect consistency where it coats the back of a spoon.
That's when you know you've nailed it. Ready to transform your cooking? Let's make this sauce.
Ingredients for asian sticky sauce
Five core ingredients plus two magic touch-ups—this sauce transforms everything it touches.
| Ingredient | Amount | Notes |
|---|---|---|
| Soy Sauce 🍶 | ½ cup | Light or dark variety preferred |
| Honey 🍯 | ⅓ cup | Pure, unfiltered for depth |
| Garlic Cloves 🧄 | 4 cloves | Minced finely for aromatic punch |
| Fresh Ginger 🌿 | 2 tbsp | Grated, not powdered |
| Red Chili Flakes 🌶️ | 1 tbsp | Adjust for desired heat level |
| Sesame Oil 🫒 | 1 tbsp | Toasted sesame oil for aroma |
| Rice Vinegar 🍶 | 1 tbsp | White or seasoned vinegar |
| Cornstarch 🌾 | 1 tsp | For thickening consistency |
The soy sauce is your flavor foundation—Kikkoman or Lee Kum Kee are my go-tos, but anything in the bottle works. Honey should be unfiltered (that means no processed brands—look for pure comb honey at Whole Foods or Trader Joe's if you want to splurge). Fresh ginger and garlic are non-negotiable here; powdered versions just won't give you that same aromatic punch. Chili flakes? Maldon or Penzeys for consistent heat—no dusty old jars from the back of your pantry.
No honey? Maple syrup works in a pinch, but it'll taste different. Skip the vinegar? Lime juice at half the amount adds brightness. Sesame oil can be swapped for neutral oil like vegetable, but you'll lose that nutty aroma. The cornstarch is key for that signature sticky texture—if you're gluten-free, use arrowroot powder instead. Pro tip: Toast your garlic and ginger in the pan first for 30 seconds before adding liquids—this builds flavor layers that make the sauce sing.
This sauce keeps for 2 weeks in the fridge, but the flavor actually improves after 24 hours as everything melds. Store it in a glass jar with a tight seal—it'll thicken more over time, so thin with a splash of water if needed. Freezes beautifully for 6 months (though I've never had leftovers that long). Double the batch—you'll want it for everything from egg rolls to grilled chicken.
Why You'll Love This Recipe
- Pantry Magic: I swear by this sauce—just five things from your fridge and spice rack, no fancy shopping. The ginger and garlic hit the stove for five minutes, then it’s honey and soy playing tag with the chili flakes. No measuring cups, no stress—just taste as you go.
- Sweet Heat Balance: That first bite? Honey and soy caramelize into something addictive, then the chili flakes wake it up like a jolt of espresso. Honestly, it’s the kind of sauce that makes you pause mid-bite because it’s that good—no weird aftertaste, just pure umami-sweet-spicy harmony.
- Glazes Everything: Between us, this sauce turns boring proteins into showstoppers. Toss it on chicken thighs before roasting, drizzle it over tofu for a weeknight stir-fry, or even slather it on grilled veggies. (Yes, even on a Tuesday night.) The stickiness clings like a dream, so you’re not scraping plates clean.
- Makes Leftovers Shine: I double the batch every time because it lasts forever in the fridge. A splash in takeout noodles? Instant upgrade. Dull rice? Suddenly it’s a meal. And the best part? It’s cheap—soy and honey stretch miles, and you’ll use it up before it gets boring.
Step-by-step instructions for Asian sticky sauce
This sauce transforms from simple ingredients into a glossy, addictive glaze that elevates everything it touches.
Bloom the Aromatics in Sesame Oil
Heat a small saucepan over medium-low heat and add the 1 tablespoon sesame oil. Let it warm for 30 seconds until fragrant—you'll smell that nutty, toasty aroma that's the soul of this sauce. Add the 4 cloves minced garlic and 2 tablespoons grated fresh ginger, stirring constantly for 1-2 minutes until the garlic turns light golden and the ginger loses its raw bite.
Here's the thing—don't walk away. Garlic burns faster than you think, and once it's browned, it turns bitter. Keep your eye on the pan and stir frequently. The aromatics should sizzle gently, releasing their oils and building the flavor foundation for everything else.
Combine Wet Ingredients and Simmer
Pour in the 0.5 cup soy sauce and 0.33 cup honey, stirring to dissolve the honey completely. Add the 1 tablespoon rice vinegar and 1 tablespoon red chili flakes, then bring the mixture to a gentle simmer over medium heat. Let it bubble away for 5-7 minutes, stirring occasionally, until it reduces by about one-third and thickens slightly.
You're looking for a sauce that coats the back of a spoon but still flows easily. The color should darken to a rich amber, and the liquid should reduce enough that it clings to your finger when you lift a spoon. This reduction step concentrates the flavors and removes some of the raw sweetness, creating that perfect balance.
Thicken for That Signature Gloss
In a small bowl, whisk together the 1 teaspoon cornstarch with 1 tablespoon cold water until completely dissolved. Pour this slurry into the simmering sauce while stirring constantly. The moment it hits the pan, you'll see the sauce thicken dramatically—it should go from syrupy to glossy and coatable within 1-2 minutes of cooking.
Continue simmering for another 2-3 minutes, stirring frequently, until the sauce reaches your desired consistency. It should be thick enough to coat the back of a spoon but still flow smoothly. If it's too thick, add 1 teaspoon water at a time until you reach that perfect balance between cling and pour.
Finish and Test for Perfection
Remove the sauce from heat and let it cool slightly—this resting period allows the flavors to meld and the sauce to thicken further. Taste and adjust the seasoning: add more soy sauce if it needs saltiness, more honey if it needs sweetness, or more red chili flakes if you want extra heat. The sauce should sing with all those flavors—sweet, salty, spicy, and umami all in harmony.
For the ultimate test, drizzle a small amount over your favorite stir-fry or noodles. It should cling beautifully, creating that signature sticky glaze that makes every bite irresistible. If it's too thin, simmer it uncovered for another 2-3 minutes to reduce further. If it's too thick, whisk in 1 teaspoon water at a time until it reaches that perfect glossy consistency.
Pro Tips For Making Asian Sticky Sauce
- Simmer Low and Slow: This sauce isn’t a race—after adding honey, drop the heat to a bare simmer. I used to blast it and end up with burnt honey bits that made the whole thing taste bitter. Let it melt in quietly for 8-10 minutes, stirring occasionally, until everything’s glossy and unified.
- Mince Ginger Like You Mean It: Skip the grater or microplane if you want real flavor. Use a sharp knife and chop the ginger into a fine paste—almost like a wet sand consistency. This releases more of its punch without turning the sauce into a chunky mess. (Yes, it’ll take 20 seconds longer, but you’ll taste the difference.)
- Balance Heat Before Tasting: Add chili flakes last, then taste immediately. If it’s too spicy, dump in a splash of honey (the sauce’s other ingredient) to mellow it out. I learned this after serving a batch that had me reaching for milk—now I adjust as I go, not after the fact.
- Use Dark Soy for Depth: Swap half the soy sauce for dark soy if you have it. It adds a molasses-like richness that cuts through the sweetness and makes the sauce taste more complex. No dark soy? A teaspoon of molasses works in a pinch—but don’t skip this step if you’re aiming for restaurant-quality flavor.
Pro cooking tips for this dish
Heat Control Secrets
Start with medium-low heat when blooming garlic and ginger—this prevents burning while allowing their flavors to develop fully. I use a stainless steel saucepan (like my All-Clad) because it distributes heat evenly.
Once the wet ingredients hit the pan, reduce to medium heat to maintain a gentle simmer. Too high, and the sauce will boil over; too low, and it won't reduce properly. 🌡️
Reduction Timing
The 5-7 minute simmer is critical—this is when the sauce transforms from thin to thick. Watch for the color to deepen to amber and the volume to reduce by one-third.
I set a timer and stir every 30 seconds to prevent scorching. If you see it darkening too quickly, lower the heat immediately. Patience here makes all the difference!
Cornstarch Slurry Hack
Whisk your cornstarch slurry (1 tsp cornstarch + 1 tbsp water) until completely smooth to avoid clumps. Pour it in a slow, steady stream while stirring constantly. The moment it hits the sauce, you'll see it thicken dramatically—this is your cue to keep stirring for 1-2 minutes more.
For a glossier finish, add ½ tsp sesame oil at the very end.
Consistency Adjustments
If your sauce is too thick after thickening, whisk in ½ tsp water at a time until it reaches that perfect coatable consistency. Too thin? Return it to low heat and simmer uncovered for 1-2 minutes, stirring constantly.
I keep a small bowl of water nearby for quick adjustments—it's my secret weapon for getting the texture just right every time. ✨
Flavor Balancing
Taste your sauce off the heat—this is when flavors meld completely. Need more saltiness? Add ½ tsp soy sauce. Too sweet? Balance with ½ tsp rice vinegar.
For extra depth, a pinch of white pepper adds warmth without altering color. The goal is harmony—all flavors should sing together, not compete.
Equipment Upgrades
My stainless steel whisk is non-negotiable for smooth sauces, but a heatproof silicone spatula works too. For precise temperature control, I use a digital thermometer—ideal simmer range is 185-195°F.
If you're making large batches, a heavy-bottomed saucepan prevents hot spots. These small upgrades make a big difference in consistency and flavor development.
Nutrition facts
Frequently asked questions
Can I use maple syrup instead of honey?
Yes, you can substitute maple syrup for honey in a 1:1 ratio, but the flavor will be slightly different. Maple syrup adds a deeper, earthier note while honey brings a floral sweetness. For the best results, use pure, unfiltered maple syrup—it mirrors honey's complexity better than processed versions. The sauce will still work beautifully, just with a distinct maple-forward profile.
How can I make this sauce less spicy?
Reduce or omit the red chili flakes entirely for a milder version. If you prefer a hint of heat without the burn, try ½ teaspoon chili flakes or swap them for 1 teaspoon mild paprika. For an extra touch of warmth without spice, add ½ teaspoon ground white pepper—it enhances flavor without the heat. Always taste as you go!
What's the best way to store leftover sauce?
Transfer the sauce to a clean, airtight glass jar and refrigerate for up to 2 weeks. The flavors actually improve over time as the ingredients meld! If the sauce thickens too much, whisk in 1 teaspoon water at a time until it reaches your desired consistency. For longer storage, freeze for up to 6 months—thaw in the fridge overnight before using.
Can I use this sauce as a marinade?
This sauce makes an excellent marinade for chicken, tofu, or shrimp. For best results, marinate proteins for 30 minutes to 2 hours in the fridge. The sticky glaze will caramelize beautifully when grilled or pan-seared, creating a perfect crust. Just reserve 2 tablespoons of the sauce for basting during cooking to prevent burning.
Why did my sauce turn bitter?
Overcooking or burning the garlic and ginger is the most common cause of bitterness. Keep heat at medium-low when blooming aromatics, and stir constantly to prevent browning. If you notice a bitter taste, balance it with ½ teaspoon honey or 1 teaspoon rice vinegar. For future batches, reduce simmering time by 1-2 minutes to avoid over-reduction.