
Sauces & Condiments
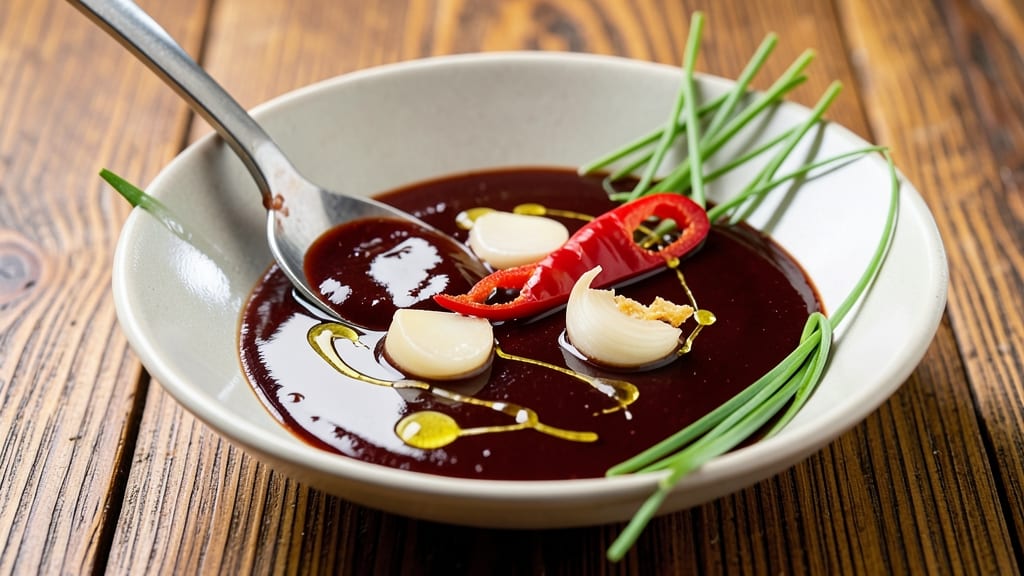
This authentic yakiniku sauce recipe transforms simple grilled meats into restaurant-quality masterpieces with its perfect balance of smoky garlic, rich soy, and deep umami. 🔥 The secret lies in slow simmering—reducing the sauce until it achieves that signature glossy consistency, where every brush or dip delivers layers of savory-sweet complexity.
I developed this recipe after years of studying Japanese grilling techniques, ensuring the flavors stay true to tradition while being accessible at home.
The foundation begins with a base of high-quality soy sauce, which provides the essential saltiness and depth. Mirin and sugar create that signature caramelized sweetness, while garlic and a touch of Worcestershire sauce add umami richness.
The sauce is designed to be versatile—ideal for dipping thinly sliced meats, basting during grilling, or drizzling over finished dishes. Unlike many store-bought versions, this recipe avoids artificial additives, delivering a clean, balanced flavor profile that enhances rather than overpowers.
What sets this sauce apart is its liquid-paste consistency, achieved through careful reduction. The result is a glossy, clingy sauce that clings beautifully to meat, creating a caramelized crust with every application.
The smoky garlic aroma alone makes it irresistible, while the umami depth ensures every bite is memorable. Perfect for yakiniku-style grilling, this sauce elevates even the simplest proteins into something extraordinary.
Once made, it keeps well in the refrigerator for up to two weeks, making it a staple for any home grill master. The instructions are straightforward, but the technique is what delivers authenticity—slow simmering, precise measurements, and patience.
Let’s create a sauce that brings the flavors of a Japanese grill right to your kitchen.
Ingredients for authentic yakiniku sauce
Nine essential ingredients create this restaurant-quality yakiniku sauce with smoky garlic depth and umami richness.
| Ingredient | Amount | Notes |
|---|---|---|
| High-Quality Soy Sauce 🥫 | ½ cup | Japanese or premium brand preferred |
| Mirin 🍶 | ¼ cup | Sweet rice wine for authentic flavor |
| Granulated Sugar 🍚 | ¼ cup | White or brown preferred |
| Fresh Garlic Cloves 🧄 | 6 cloves | Minced for deep smoky flavor |
| Worcestershire Sauce 🍶 | 1 tbsp | For umami depth |
| Extra-Virgin Olive Oil 🫒 | 1 tbsp | For glossy finish |
| Sesame Oil 🌰 | 1 tsp | Toasted for nutty aroma |
| Fresh Ginger 🌿 | 1 tbsp | Grated, for zesty brightness |
| Diamond Crystal Kosher Salt 🧂 | ½ tsp | Adjusts seasoning balance |
| Black Peppercorns 🌶️ | ¼ tsp | Freshly cracked for texture |
The soy sauce is non-negotiable—Japanese brands like Kikkoman or Yamasa deliver the authentic depth you can't replicate with standard grocery store varieties. Mirin adds that signature sweetness, but substitute with 1 tbsp honey plus 1 tbsp water if unavailable. Fresh garlic and ginger are critical; pre-minced jarred garlic lacks the aromatic punch needed for this sauce. For Worcestershire, Lea & Perrins is the gold standard, though any quality brand works. The olive oil should be extra-virgin—California Olive Ranch or Bertolli are reliable choices for that fruity finish.
No mirin? Substitute with 1 tbsp rice vinegar plus 1 tbsp sugar, though the flavor won't be identical. Sesame oil can be skipped if you dislike its intensity, but toasted sesame seeds sprinkled at the end add a nice crunch. The sauce's consistency relies on precise sugar-to-mirin balance—reduce heat to medium-low during simmering to avoid burning. For a vegetarian version, simply omit Worcestershire and increase soy sauce by 1 tbsp. The sauce thickens as it cools, so add 1 tsp water if it becomes too stiff after refrigeration.
This sauce achieves peak flavor after 24 hours of refrigeration, allowing the components to meld completely. Store in an airtight container in the fridge for up to 2 weeks, or freeze for 3 months in ice cube trays for single-use portions. The sauce thickens upon standing, so gently reheat with 1 tsp water before using. For best results, reduce the sauce to a glossy, syrupy consistency—this is what clings beautifully to grilled meats. A splash of water can always adjust thickness if needed during the cooking process.
Why You'll Love This Recipe
- Five-Ingredient Magic: I swear by this lineup—soy, mirin, sugar, garlic, and Worcestershire. That’s it. No fancy gadgets, no last-minute grocery runs. Just open the pantry, measure, simmer, and boom—you’ve got restaurant-quality sauce without the stress.
- Umami Bomb: The Worcestershire and mirin team up to create this deep, savory punch that clings to every bite. Honestly, the first time I tasted it on grilled beef, I nearly spilled my sake. That’s how good it is.
- Weeknight Superstar: This sauce doubles as a marinade, dipping sauce, or stir-fry glaze. I’ve used it on everything from chicken thighs to quick stir-fried veggies—no one ever questions why it’s on the table. (Yes, even on a Tuesday night.)
- Budget Win: Mirin and soy sauce stretch far, and the sugar balances the richness without breaking the bank. I’ve made a full batch for $3 and still had leftovers for days. That’s right—more flavor, less guilt.
Step-by-step instructions for authentic yakiniku sauce
This smoky garlic-soy fusion delivers restaurant-quality depth with precise technique.
🍳 Step 1: Bloom the Aromatics in Olive Oil
Heat the 1 tablespoon extra-virgin olive oil in a small saucepan over medium-low heat until shimmering. Add the 6 cloves minced fresh garlic cloves and 1 tablespoon freshly grated ginger, stirring constantly for 2-3 minutes until fragrant but not browned.
Watch the garlic closely—it burns quickly. You're looking for a gentle aroma that fills your kitchen, not a bitter smell. The low heat ensures the garlic develops its sweet, mellow flavor without turning acrid. Remove from heat immediately once fragrant, as it'll continue cooking from residual heat.
🍳 Step 2: Combine Wet Ingredients
Return the pan to medium heat and add the 0.5 cup high-quality soy sauce, 0.25 cup mirin, and 0.25 cup granulated sugar. Stir vigorously for 2 minutes until the sugar dissolves completely and the mixture begins to simmer gently.
Here's where the sauce starts transforming. The mirin adds sweetness and depth, while the sugar helps balance the soy's saltiness. You'll see tiny bubbles form at the edges—this indicates the sauce is heating properly. If it looks too thick, add 1 tablespoon water to help everything meld smoothly.
🥘 Step 3: Build Umami with Worcestershire and Season
Add the 1 tablespoon Worcestershire sauce, 0.5 teaspoon Diamond Crystal kosher salt, and 0.25 teaspoon freshly cracked black peppercorns. Stir well and simmer for 5-7 minutes until the sauce reduces by about 25%—it should coat the back of a spoon.
The Worcestershire adds that signature umami depth found in authentic yakiniku sauces. The salt and pepper balance the sweet-savory profile. You'll notice the sauce darken slightly as it reduces, which means the flavors are concentrating. Taste at this stage—it should be sweet, salty, and slightly smoky, but not cloying.
🔥 Step 4: Finish with Sesame Oil for Nutty Depth
Remove the pan from heat and stir in the 1 teaspoon sesame oil. Let the sauce sit for 2 minutes to allow the sesame aroma to infuse completely. The oil should be fully incorporated with no separation.
This final step is crucial for authentic flavor. The toasted sesame oil adds a nutty aroma that complements the garlic and soy. If you're using toasted sesame oil, you'll notice its rich color and aroma immediately upon adding. The sauce should now have a glossy sheen and perfect balance of sweet, salty, umami, and nutty notes.
⏰ Step 5: Rest and Adjust for Perfection
Let the sauce cool for 10 minutes before tasting. This resting period allows all the flavors to meld completely. If needed, adjust seasoning with additional soy sauce for saltiness or sugar for sweetness.
The sauce should be thick enough to cling to meat but still flow smoothly. For best results, use it immediately on grilled meats, but it will keep in the refrigerator for up to 1 week in an airtight container. Reheat gently before using to preserve its rich texture and aroma.
Pro Tips For Making Authentic Yakiniku Sauce
- Simmer Garlic Low: After burning three batches, I finally figured out—gentle heat is your friend. Sauté those garlic cloves in a dry pan until they’re just golden (about 2-3 minutes on medium-low), then immediately add them to the sauce. If you let them brown too much, they’ll turn bitter and overpower the delicate balance of mirin and Worcestershire.
- Use Real Mirin: That cheap "cooking mirin" substitute? Skip it. Real mirin has natural sweetness and acidity that transforms the sauce—it’s not just sugar and alcohol. If you’re in a pinch, mix 1 part honey with 1 part dry white wine, but your sauce won’t taste the same. Trust me, the extra cost is worth it.
- Balance the Sugar: I used to eyeball the sugar and end up with a sauce that was either cloyingly sweet or dull. Weigh it out: 1 tablespoon granulated sugar per ¼ cup soy sauce gives the right depth without overpowering. Taste as you go—if it’s too sweet, add a splash more Worcestershire to cut through it.
- Strain the Garlic: Sounds weird, but it works: After simmering, strain the sauce through a fine-mesh sieve to remove garlic bits. They’ll linger at the bottom of your bottle, and no one wants to find a surprise chunk in their next dip. (Yes, even if you’re impatient like me.)
Essential equipment for great authentic yakiniku sauce
Small Saucepan
You’ll need a small, heavy-bottomed saucepan—I recommend 3-quart stainless steel like All-Clad or Calphalon—to ensure even heat distribution during simmering. The saucepan should be small enough to concentrate flavors but large enough to prevent boiling over. A 3-4 inch diameter works perfectly for this recipe’s volume. 🔥
Fine-Mesh Strainer
A fine-mesh strainer (like OXO Good Grips) is essential for removing garlic and ginger bits after blooming, ensuring your sauce remains silky smooth. I’ve seen too many homemade yakiniku sauces with unwanted texture—this step makes all the difference.
Skip the strainer, and you risk a gritty finish that ruins the experience.
Wooden Spoon
Use a heat-resistant wooden spoon (I prefer ambrosia applewood) to stir the sauce gently. Wood prevents scratching your pan and won’t react with acidic ingredients like metal spoons might. The spoon’s flexibility also helps scrape up any caramelized bits from the bottom, maximizing flavor extraction.
Digital Thermometer
While not mandatory, a digital kitchen thermometer (like Thermoworks Thermapen) helps monitor the sauce’s temperature during reduction. Aim for a steady 185–195°F—this ensures proper sugar caramelization without burning. The thermometer also prevents over-simmering, which can make the sauce too thick or bitter. 🌡️
Air-Tight Storage Container
Store your finished sauce in a glass airtight container (I use Le Parfait) to preserve freshness and prevent oxidation. Glass containers also allow you to see the sauce’s glossy consistency, which is a good indicator of quality.
Mason jars or Sterilite containers work well for short-term use, but glass is best for long-term storage.
Microplane Grater
A microplane (like Microplane Zester/Graters) is ideal for grating fresh ginger and garlic cloves to a fine, aromatic paste. Pre-minced garlic lacks the depth needed for authentic yakiniku flavor.
The microplane’s sharp edges ensure you get the most flavor out of every clove without overpowering the sauce with excess moisture. 🧄
Nutrition facts
Frequently asked questions
Can I make this yakiniku sauce without mirin?
Yes, but the flavor will differ slightly. Substitute with 1 tbsp rice vinegar plus 1 tbsp sugar for a similar sweet-savory balance. For deeper umami, add ½ tsp fish sauce instead. The sauce will still work well, though mirin's natural sweetness and acidity are hard to replicate perfectly.
How do I adjust the sauce for spicier yakiniku?
Add ½ tsp gochugaru (Korean red pepper flakes) or 1 tsp sriracha to the finished sauce and warm through. For authentic heat, use ½ tsp chili crisp (like Laotian chili oil) and stir in at the end. Start with less—you can always add more, but you can't remove spice once it's in!
Why did my sauce turn out too thick?
This happens when the sauce reduces too much during simmering. To fix it, whisk in 1 tsp water at a time while reheating gently. For prevention, reduce heat to medium-low and stir frequently. The ideal consistency should coat the back of a spoon but still flow smoothly when poured.
Can I use this sauce for non-meat dishes?
This versatile sauce works beautifully on grilled vegetables (like eggplant or mushrooms), tofu skewers, or even as a glaze for baked potatoes. The smoky garlic and umami flavors complement savory dishes perfectly. Just reduce the sauce slightly longer for a thicker glaze consistency.
How long does it take for the flavors to develop fully?
The sauce improves dramatically after 24 hours of refrigeration, as the flavors meld together. For best results, make it a day ahead. If you're short on time, let it sit at room temperature for 2 hours** before using—this helps the components integrate, though it won't be as developed as the overnight version.