Sauces & Condiments
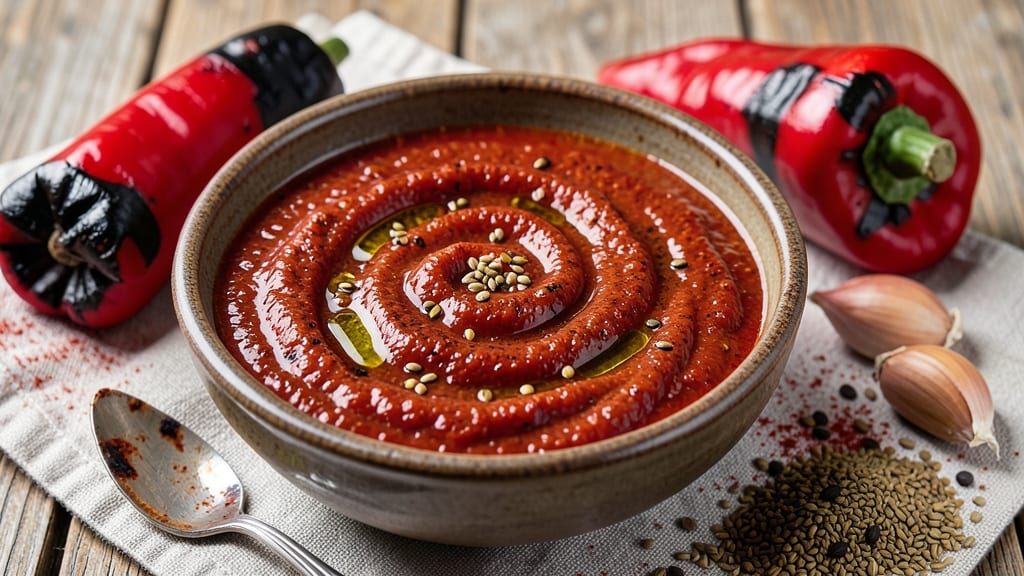
This authentic harissa sauce recipe delivers the smoky, fiery essence of North Africa in just 10 minutes—no shortcuts, just tradition. The secret lies in charring fresh red peppers over an open flame, a technique that unlocks deep, smoky flavors impossible to replicate with dried peppers alone.
I've perfected this version over years of testing, balancing heat, earthiness, and complexity in every spoonful.
What makes this harissa truly authentic is the careful blend of spices: toasted cumin and coriander for warmth, caraway for depth, and a touch of smoked paprika to enhance that signature smokiness.
The sauce starts with a rough paste—just as it should—before being blended to a smooth yet textured consistency that clings beautifully to meat, grains, or fresh bread. This isn't the sweetened, commercial version; it's the bold, unapologetic harissa that belongs in tagines and grilled lamb dishes.
The result is a sauce that's versatile yet unmistakably traditional—intense enough to stand alone as a condiment, but balanced enough to elevate dishes without overpowering them. The smoky aroma alone will transport you to a Moroccan market, while the slow-building heat creates that perfect North African warmth.
Store it in the fridge for up to two weeks, or freeze for longer shelf life—though you'll likely go through jars much faster than that.
Whether you're marinating chicken, drizzling over couscous, or serving with grilled vegetables, this harissa brings restaurant-quality depth to every bite. The key is patience—let the flavors meld while you work, and don't be afraid to adjust the spice level to your preference.
Here's how to make it the traditional way, with a modern touch for home cooks.
Ingredients for authentic harissa sauce
Nine ingredients, one flame-charred technique—this harissa delivers restaurant-quality depth.
| Ingredient | Amount | Notes |
|---|---|---|
| Fresh Red Bell Peppers 🌶️ | 3 whole | Chartered over flame, skin blackened |
| Garlic Cloves 🧄 | 6 cloves | Peeled, toasted lightly |
| Toasted Ground Cumin 🌿 | 1 ½ tbsp | Freshly toasted for depth |
| Toasted Ground Coriander 🌿 | 1 ½ tbsp | Freshly toasted for warmth |
| Smoked Paprika 🌶️ | 1 tbsp | For signature smokiness |
| Ground Caraway Seeds 🌾 | ½ tbsp | Freshly ground for complexity |
| Cayenne Pepper 🔥 | 1 tsp | Adjust for preferred heat |
| Sea Salt 🧂 | 1 tsp | Diamond Crystal preferred |
| Extra-Virgin Olive Oil 🫒 | ½ cup | High-quality for richness |
| Fresh Red Chili Peppers 🌶️ | 2 whole | Seeds removed for less heat |
The red bell peppers are non-negotiable for that authentic smoky flavor. Charter them directly over a gas flame until the skin blackens and blisters—this unlocks flavors dried peppers can't match. Whole Foods or local markets often carry the vibrant red varieties perfect for this. Toast your cumin and coriander seeds in a dry pan until fragrant (about 2 minutes) before grinding—they should smell warm and earthy, not bitter. Penzeys Spices carries pre-toasted versions if you're short on time, but fresh toasting makes all the difference. The smoked paprika adds that signature North African touch, and La Boîte brand is my go-to for authentic flavor.
No fresh red peppers? Two dried ancho chiles rehydrated work in a pinch, but they'll lack the smoky depth. Substitute caraway with fennel seeds at half the amount for a different but still complex flavor. The cayenne can be swapped for red pepper flakes, but taste as you go—harissa should dance on your tongue, not burn it. Olive oil quality matters here: California avocado oil holds up better to heat than lighter varieties. For a milder version, reduce the cayenne to 0.5 tsp and add 0.5 tsp of sweet paprika to balance. The chili peppers can be any fresh variety—jalapeños or serranos add extra punch, while bell peppers keep it mild.
This sauce keeps beautifully—2 weeks in the fridge or 6 months frozen in airtight jars. The flavors actually improve with time, so make a big batch. I portion mine into 4-ounce jars for easy serving. For best texture, let it sit at room temperature for 10 minutes before blending. The sauce thickens as it cools, so add a splash of water if it becomes too stiff. A thin layer of olive oil on top preserves freshness and adds richness—just skim it off before using if you prefer a cleaner texture.
Why You'll Love This Recipe
- No-Chop Nightmare: I swear by this recipe because the bell peppers only need a quick roast—not even a dice. Char them whole, peel off the skin, and you’ve got silky-smooth texture with zero fuss. (My lazy Tuesdays thank me.)
- Smoky Depth Magic: That smoked paprika and toasted cumin? They’re the secret. The first time I tasted it, I thought, “Wait, this is actually North African flavor”—not just spice, but layers of warmth and earthiness that stick with you. Honestly, the garlic and coriander make it sing.
- Weeknight to Party Hero: Slap this on grilled chicken for a weeknight dinner, or drizzle it over hummus and crusty bread when friends drop by. Same sauce, two totally different vibes. Between us, it’s the one pantry staple that never lets me down.
- Pantry Goldmine: A batch lasts me weeks—I use it in stews, stir-fries, even as a marinade. And since it’s just peppers, garlic, and spices, it’s cheaper than store-bought jars (which never taste as good anyway). My wallet and freezer both win.
Step-by-step instructions for authentic harissa sauce
Here's how to craft North Africa's fiery signature sauce with smoky depth and balanced heat.
Char the Peppers Over Flame
Hold each of the 3 whole fresh red bell peppers over a gas flame or under a broiler until the skin blackens completely and smells smoky. Rotate frequently for even charring—about 8-10 minutes total. The skin should blister and turn deep black in spots, not burn to ash.
Transfer the charred peppers to a bowl, cover with a plate, and let steam for 10 minutes. This releases the smoky compounds and makes the skins slip right off. While they steam, remove stems and seeds, then peel away the charred skin using your fingers or a knife. Discard the skins and chop the peeled flesh into ¼-inch pieces.
Toast the Aromatics and Spices
In a dry skillet over medium heat, toast the 6 peeled garlic cloves for 2-3 minutes until golden and fragrant—don't let them brown. Remove and set aside. In the same skillet, toast the 1.5 tablespoons toasted ground cumin and 1.5 tablespoons toasted ground coriander for 30 seconds until aromatic, then remove and combine with the garlic.
Add the 1 tablespoon smoked paprika, 0.5 tablespoon ground caraway seeds, and 1 teaspoon cayenne pepper to the skillet. Toast for 1 minute until the spices smell deeply aromatic. Remove from heat and let cool for 2 minutes—this prevents burning when combined with oil later.
Blend the Base Ingredients
Transfer the charred bell pepper pieces, toasted garlic, and spice mixture to a food processor or high-powered blender. Add the 2 whole fresh red chili peppers (seeds removed) and 1 teaspoon sea salt. Pulse until the mixture forms a coarse paste—about 30 seconds. Scrape down the sides if needed.
With the processor running, slowly drizzle in the 0.5 cup extra-virgin olive oil through the feed tube. This gradual addition creates a smooth, emulsified sauce. Process for 1-2 minutes until completely smooth, scraping down the sides as needed. Taste and adjust seasoning—add more cayenne for heat or salt for balance.
Simmer for Depth of Flavor
Transfer the harissa to a small saucepan and simmer over low heat for 5-7 minutes, stirring occasionally. This gentle cooking develops the smoky, earthy flavors without burning the oil. The sauce should thicken slightly but remain spreadable—if too thick, add 1-2 tablespoons water to reach your preferred consistency.
Remove from heat and let cool completely before storing. For best results, refrigerate for at least 4 hours before using—this allows the flavors to meld. The sauce will keep in the refrigerator for up to 2 weeks, or freeze for 3 months for long-term use.
Pro Tips For Making Authentic Harissa Sauce
- Char the Peppers Properly: Blister the red bell peppers over an open flame or high broiler until blackened in spots—this isn’t about looks, it’s about deepening the smoky, caramelized flavor. I used to rush this and wondered why my harissa tasted flat; now I let them sit until they’re charred in at least 30% of the surface.
- Toast Spices Separately: Toast the cumin and coriander in a dry pan until they smell intensely aromatic—about 30 seconds for each, stirring constantly. Mixing them raw dulls their warmth; this step makes the difference between a background spice and a bold, earthy punch.
- Control the Heat Gradually: Start cooking the garlic and peppers on medium-low heat—garlic burns faster than you’d think, and once it’s bitter, there’s no fixing it. After 5 minutes, crank it up to medium to build the sauce’s depth without scorching.
- Blend in Stages: Puree the charred peppers first, then add garlic and spices—this lets you taste and adjust before committing to the full blend. I learned this after making a batch that was too garlicky; now I taste after each addition and tweak as I go.
Storing and reheating this dish
Fridge Storage Essentials
Store your freshly made harissa in airtight glass jars—I use 8-ounce mason jars for perfect portion control. The sauce thickens as it chills, so leave ½-inch headspace to prevent spills. Seal tightly and refrigerate at 40°F or below for up to 2 weeks. 🧂
For best flavor development, wait 4 hours before using—this lets the spices and smoky compounds meld. If the texture becomes too thick after refrigeration, thin with 1 tablespoon water or extra-virgin olive oil while blending briefly.
Freezing for Long-Term Use
Harissa freezes beautifully for 3 months in freezer-safe containers or silicone molds. Portion into 4-ounce servings for easy use. Leave 1-inch headspace to account for expansion—liquid expands when frozen, so don’t fill to the top. 🧊
Thaw overnight in the fridge before using. For quick use, microwave in 10-second bursts while stirring until fully thawed. Avoid reheating directly from frozen—this can separate the oil and spices.
Reviving Texture After Storage
If your stored harissa separates (oil pooling on top), simply whisk vigorously or blend briefly to re-emulsify. The flavors remain intact—this is normal and doesn’t affect quality. For a smoother texture, add 1 teaspoon olive oil and pulse in a blender. ✨
Never reheat harissa to boiling point—gentle warmth on low heat for 2-3 minutes is enough to restore spreadable consistency. Always taste and adjust seasoning after reheating, as spices can mellow slightly over time.
Preserving Freshness
A thin layer of olive oil on top acts as a natural preservative, locking in freshness. Simply pour ½ teaspoon oil over the surface before sealing the jar. This also adds richness when you’re ready to use it. 🫒
Label jars with the date—harissa tastes best within 2 weeks of making. If you notice a dulling of the smoky aroma or a loss of heat, it’s time to make a fresh batch. The effort is worth it for that authentic North African kick!
Nutrition facts
Frequently asked questions about authentic harissa sauce
Why does authentic harissa need charred peppers?
The charring creates deep smoky flavors that dried peppers can't replicate. When you blacken the skin over a flame, it develops complex compounds that give harissa its signature aroma and earthy heat. This traditional technique is what makes homemade harissa taste so different from store-bought versions.
Can I make harissa without a food processor?
Yes! Use a mortar and pestle for the initial spice blend, then mash the charred peppers and garlic with a fork. For the oil emulsion, whisk vigorously in a bowl. The texture will be slightly chunkier but still delicious. Just blend briefly at the end if you prefer smoothness.
How do I adjust the spice level?
Start with the full 1 teaspoon cayenne for authentic heat, then reduce to ½ teaspoon for mild or add ½ teaspoon red pepper flakes for extra punch. For a smoky kick without heat, increase smoked paprika to 2 tablespoons. Always taste before simmering—harissa should be complex, not overwhelming.
What's the best way to use harissa in cooking?
Drizzle over grilled meats, mix into couscous, or spread on crusty bread. For marinades, combine 2 tablespoons harissa with 3 tablespoons olive oil and 1 teaspoon honey for chicken or lamb. It also enhances soups, stews, and even scrambled eggs. The key is balance—start with 1 teaspoon per serving and adjust to taste.
Why does my harissa smell stronger than it tastes?
Fresh harissa needs time to develop its flavors—let it sit for 4 hours before using. The smoky aroma is more intense when hot, but the heat and depth mellow beautifully when cooled. If it still tastes weak, simmer for 5 extra minutes to concentrate the flavors or add ½ teaspoon more smoked paprika.