
Sauces & Condiments
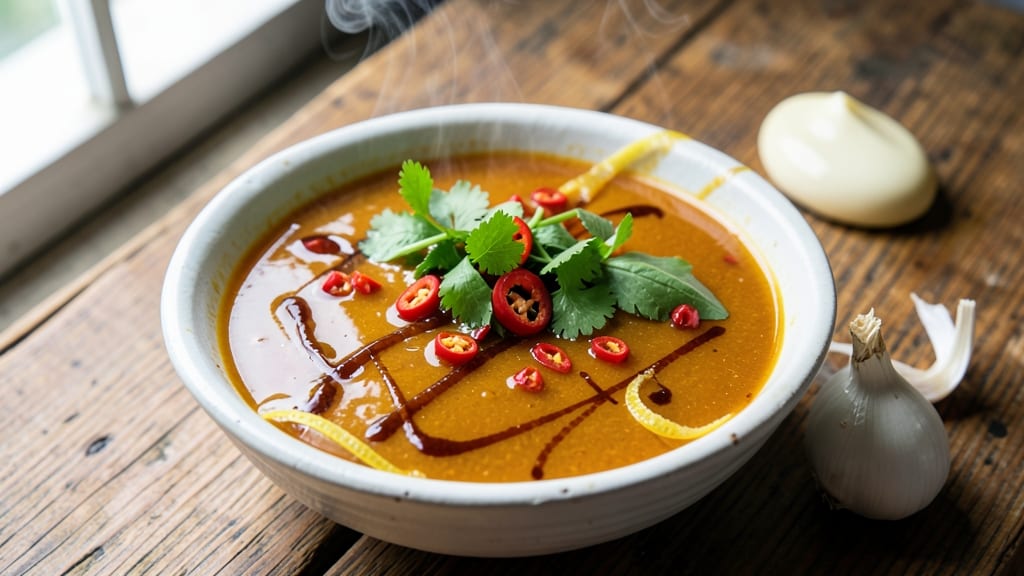
This authentic Thai dipping sauce recipe delivers the perfect balance of tangy lime, sweet chili, and umami depth that makes every bite unforgettable. ✨ The secret lies in traditional ratios—fish sauce for saltiness, lime for brightness, and palm sugar for just the right amount of sweetness—all blended into a silky, versatile sauce that elevates spring rolls, grilled meats, or fresh vegetables.
The beauty of this recipe is its simplicity: just 7 ingredients and 10 minutes of prep, yet the flavors are complex and restaurant-worthy. Unlike store-bought versions, this sauce builds layers of taste through proper ingredient ratios, ensuring every drop is packed with authentic Thai flavor without overpowering your dish.
What you’ll end up with is a smooth, glossy sauce that’s tangy, slightly sweet, and just spicy enough to wake up your taste buds. It’s the kind of condiment that transforms ordinary meals into something special—whether you’re dipping, drizzling, or tossing it into stir-fries.
Perfect for meal prep or last-minute gatherings, this sauce keeps well in the fridge for up to a week. Let’s make it—your next dish will never be the same.
Ingredients for authentic thai dipping sauce
Seven ingredients, Thai-inspired magic—this sauce delivers restaurant-quality tangy-sweet balance every time.
| Ingredient | Amount | Notes |
|---|---|---|
| Fish Sauce 🍜 | ½ cup | Red Boat preferred for authenticity |
| Palm Sugar 🍯 | ¼ cup | Or substitute brown sugar |
| Fresh Lime Juice 🍋 | ⅓ cup | About 2-3 limes, freshly squeezed |
| Rice Vinegar 🍶 | ¼ cup | White or seasoned preferred |
| Fresh Chili Peppers 🌶️ | 2 whole | Thai bird's eye or serrano, finely chopped |
| Garlic Cloves 🧄 | 3 cloves | Freshly minced for maximum flavor |
| Water 💧 | ¼ cup | Room temperature preferred |
The fish sauce is non-negotiable for that signature umami punch. Red Boat is my go-to—it’s clean, potent, and free from additives. If you can’t find it, Thai Kitchen brand works in a pinch, but avoid anything with a metallic aftertaste. Palm sugar adds authentic sweetness, though light brown sugar is a perfect substitute if you’re in a hurry. Fresh lime juice is key here—bottled won’t cut it. Squeeze those limes right before blending, and save the zest for garnish if you’re feeling fancy. The chili peppers? Thai bird’s eye if you can find them—they pack serious heat. If you’re sensitive to spice, serrano peppers work, but you’ll need twice the amount for similar kick.
No fish sauce? Soy sauce plus a splash of oyster sauce mimics the umami, though it won’t be identical. Running short on palm sugar? Honey or agave at half the amount works, but the texture will be slightly thinner. Fresh garlic and chili can be swapped for 1 tsp garlic powder plus 1/2 tsp cayenne, though fresh is always better. The rice vinegar can be replaced with apple cider vinegar, but it’ll taste slightly less bright. Pro tip: Toast the garlic cloves in a dry pan for 30 seconds before mincing—it deepens the flavor. And if your chili peppers are too spicy, remove the seeds before chopping.
This sauce keeps beautifully—1 week in the fridge sealed in a jar, or 3 months in the freezer if you portion it into ice cube trays. The flavors actually improve after a day or two as everything melds together. For meal prep, I double the batch and store it in small glass jars—perfect for drizzling over takeout or tossing into stir-fries. If it thickens over time, just add a splash of water to loosen it up. And trust me, every drop is worth it—this isn’t the kind of sauce you want to make just once.
Why You'll Love This Recipe
- Five-Ingredient Magic: I swear by this combo—fish sauce’s umami punch, lime’s bright zing, and chili’s heat all balance perfectly with just a touch of sweet palm sugar. No fancy techniques, just a quick whisk and you’ve got flavor that hits every time.
- No-Fuss Flexibility: Between us, this sauce is my lazy dinner’s best friend. Drizzle it over grilled shrimp for a weeknight win, toss it with cold noodles for a 10-minute meal, or keep it in the fridge to jazz up anything from veggie sticks to leftover takeout.
- Balanced Heat: The chili peppers give it a kick, but the vinegar and sugar tame it into something addictive—not overwhelming, just right. I’ll be real: my kids even ask for it now, and they’re usually the ones turning up their noses at spice.
- Pantry Powerhouse: Honestly, you’re probably already making this. Fish sauce, lime, vinegar—those staples don’t cost much, and a little goes a long way. A jar lasts me months, and I’m always reaching for it because it’s cheap, bold, and never lets me down.
Step-by-step instructions for authentic Thai dipping sauce
Here's how to balance bold flavors for a sauce that's tangy, sweet, and perfectly spicy.
🍳 Step 1: Sauté Aromatics Until Fragrant
Heat a small saucepan over medium heat and add the 3 cloves minced garlic cloves. Cook for 30 seconds until you can smell that irresistible garlic aroma—this is your signal it's ready. Immediately add the 2 whole fresh chili peppers, sliced thinly, and cook for another 30 seconds until they soften slightly but don't burn.
Watch the pan carefully—garlic burns in seconds, and you want that nutty aroma, not bitter smoke. The chili peppers should just barely wilt, releasing their fiery essence. This quick cooking preserves their heat while softening them enough to blend smoothly into the sauce.
🥘 Step 2: Combine Wet Ingredients
Pour in the 0.5 cup fish sauce and 0.25 cup palm sugar, stirring constantly to dissolve the sugar completely. The mixture will bubble gently—let it simmer for 1-2 minutes until the sugar fully integrates and the sauce begins to thicken slightly.
Here's the thing—fish sauce has a strong umami flavor that needs time to meld with the sugar. You'll see tiny bubbles form as the mixture reduces slightly, creating a deeper, more complex base. If you taste it now, you'll notice the sweetness and saltiness balancing each other out.
🍋 Step 3: Add Acid and Water for Balance
Remove the pan from heat and stir in the 0.33 cup fresh lime juice and 0.25 cup rice vinegar. The sauce will immediately brighten in color and become more tangy. Return to low heat and add the 0.25 cup water, stirring constantly for 1 minute until everything is fully combined.
This is where the sauce comes together—acid cuts through the richness of the fish sauce and sugar, while the water prevents it from becoming too thick. You'll see a glossy sheen develop as the flavors meld. Taste and adjust: need more heat? Add a pinch of chili flakes. Too sweet? A splash more lime juice.
⏰ Step 4: Simmer and Rest for Depth
Let the sauce simmer gently for 5 minutes over low heat, stirring occasionally. You're looking for a slight reduction in volume and a thicker, more cohesive texture. The aroma should be complex—sweet, tangy, with a hint of smoky garlic and chili heat.
Once simmered, transfer the sauce to a bowl and let it cool to room temperature. This resting period allows the flavors to fully develop and meld. I like to taste it again after 10 minutes—you'll notice the heat becomes more pronounced, the sweetness mellows slightly, and the overall balance deepens.
🍽️ Step 5: Strain and Serve
Use a fine-mesh strainer to remove any remaining chili seeds or garlic bits if you prefer a smoother texture. Pour the sauce into a clean jar or bowl. The final consistency should be like a thick syrup—just viscous enough to cling to your fingers when you dip.
This sauce works magic with grilled meats, spring rolls, or even fresh fruit. For extra authenticity, let it sit in the fridge for 1 hour before serving—the flavors will continue to develop and intensify. The perfect dipping sauce should make you crave another bite after just one taste!
Pro Tips For Making Authentic Thai Dipping Sauce
- STRAIN THE CHILI JUICE: After pulsing chilies in a blender, pour the mixture through a fine-mesh sieve or cheesecloth—twice if you’re picky. I learned this the hard way when my first batch had tiny seeds and skin floating in it, making every bite gritty. Save the leftover pulp for a quick stir-fry, but don’t skimp on filtering.
- DISSOLVE THE SUGAR FIRST: Warm the fish sauce and palm sugar together in a small saucepan over low heat until the sugar melts completely—no more than 2-3 minutes. Cold water or rushing this step leaves grainy bits that ruin the silky texture. Stir occasionally, but don’t walk away.
- USE AGED FISH SAUCE: Skip the cheap, pungent brands—aim for a 3-year-aged fish sauce like Red Boat or Tiparos. The older it is, the deeper the umami, and the less you’ll need to overpower the sauce with extra lime or vinegar. Trust me, your taste buds will notice the difference immediately.
- BALANCE IN THREE STAGES: Taste as you go: first after mixing fish sauce and sugar, then after adding vinegar, and finally after lime. Adjust each component separately—too much lime at once kills the complexity. I used to dump everything in and chase the flavor, but layering it makes all the difference.
Make-ahead tips for authentic thai dipping sauce
Batch Prep Strategy
Double the recipe and store it in small glass jars—this way, you always have a ready-to-use sauce for last-minute meals. I keep one jar in the fridge and one in the freezer.
When you need it, simply thaw overnight in the refrigerator or reheat gently on the stovetop for 2-3 minutes until smooth. 💡
Freezer Storage
Portion the sauce into ice cube trays before freezing—this makes it easy to grab just the right amount for a single serving. Once frozen, transfer the cubes to a ziplock bag and store for up to 3 months.
To use, pop out a cube and let it thaw at room temperature for 10 minutes before drizzling.
Flavor Development
Let the sauce sit in the fridge for at least 1 hour before using—this allows the flavors to meld and intensify. The longer it rests (up to 24 hours), the more complex and balanced it becomes.
I often make a big batch on Sundays so it’s ready for the week ahead. 🌟
Thickness Adjustments
If your sauce thickens over time, simply add 1-2 teaspoons of water and stir well to restore its glossy consistency. For a thicker sauce, simmer it uncovered on the stovetop for 3-5 minutes until it reduces slightly. The key is to maintain that perfect balance between tangy, sweet, and spicy.
Garnish Ideas
Before serving, garnish with fresh cilantro leaves, lime zest, or crushed peanuts for added texture and visual appeal. These toppings not only enhance the presentation but also add another layer of flavor.
I love sprinkling a pinch of flaky sea salt just before dipping for a final touch of sophistication.
Meal Prep Timeline
Here’s my foolproof schedule: Make the sauce on Sunday morning and let it sit in the fridge all week. By Wednesday, the flavors are fully developed, and you’ll have a restaurant-quality condiment ready for any meal.
Store it in a dark glass jar to preserve its vibrant color and freshness. Trust me, you’ll be the hero of every dinner party. ✨
Nutrition facts
Frequently asked questions
Can I make this sauce without fish sauce?
Yes, but the flavor won't be as authentic. Replace the 0.5 cup fish sauce with 0.3 cup soy sauce plus 1 tablespoon oyster sauce for umami depth. The sauce will still be tangy and sweet, but the salty-savory profile will differ slightly. For a vegetarian option, use 1 tablespoon coconut aminos plus 1 teaspoon miso paste.
How spicy should this sauce be?
The recipe uses 2 whole Thai bird’s eye chilies, which gives a medium-high heat level. For milder heat, reduce to 1 chili or remove seeds before chopping. For extra spice, add 1/2 teaspoon chili flakes or an extra chili. Taste as you go—the sauce can always be adjusted!
What’s the best way to store leftover sauce?
Transfer to an airtight glass jar and refrigerate for up to 1 week. For longer storage, freeze in ice cube trays (thaw in 10 minutes at room temp) or small portions in a ziplock bag (lasts 3 months). The flavors actually improve after 24 hours in the fridge!
Can I use this sauce for cooking instead of dipping?
This versatile sauce works as a marinade for grilled meats, a stir-fry sauce, or a glaze for roasted vegetables. For marinades, reduce the lime juice to 0.2 cup to prevent over-brightening the meat. Simmer with 1 tablespoon soy sauce for extra depth when using as a cooking sauce.
Why does my sauce look cloudy or separated?
This usually happens if the sugar didn't fully dissolve during cooking or if the sauce sat too long without stirring. Reheat gently on low heat while stirring until smooth, or whisk in 1 teaspoon water to restore consistency. For prevention, always dissolve the sugar completely during the 1-2 minute simmer step.