
Sauces & Condiments
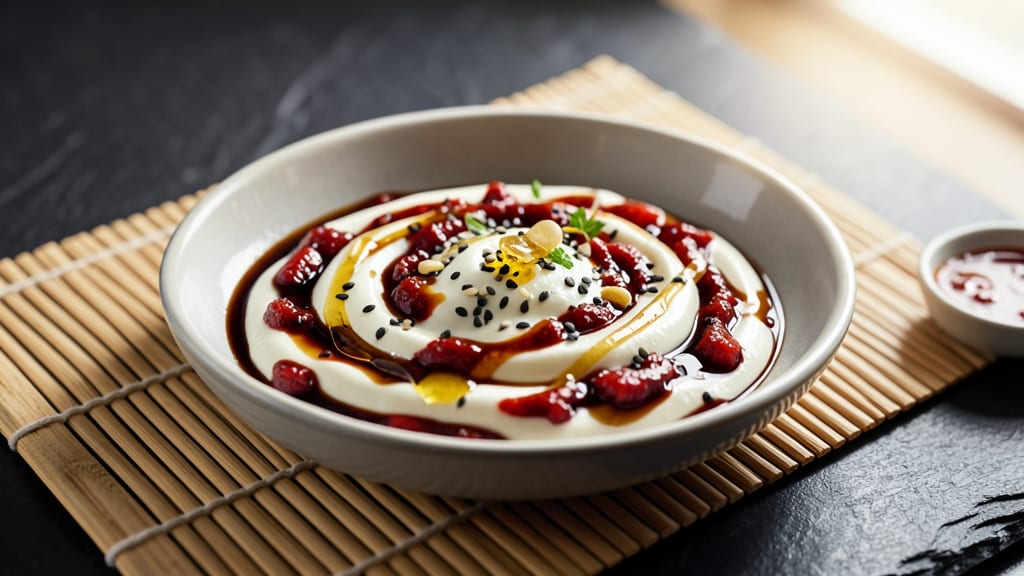
This Aloha Poke Samurai Sauce recipe transforms simple ingredients into a bold, smoky-spicy fusion that elevates every poke bowl. 🌟 The perfect balance of garlic, chili, and sesame delivers restaurant-quality depth with minimal effort—just 10 minutes of prep and 5 minutes of simmering.
What makes this sauce special is its versatility: it works as a dipping sauce for fresh fish, a topping for rice bowls, or even a marinade for grilled shrimp.
The secret lies in the umami-rich combination of soy sauce, sesame oil, and a touch of honey for balance, while fresh garlic and chili paste create the signature kick.
A quick simmer brings out the flavors without overpowering them, and the finishing touch—a sprinkle of toasted sesame seeds—adds texture and aroma. This sauce is designed to complement, not dominate, making it ideal for pescatarians and seafood lovers.
What you’ll end up with is a silky, vibrant sauce that’s both spicy and savory, with a subtle smokiness that lingers on the palate. The celery crowns add a satisfying crunch, while the sauce itself delivers layers of flavor in every bite.
It’s the kind of condiment that turns a simple meal into something extraordinary—perfect for meal prep or last-minute gatherings.
Store it in an airtight container in the fridge for up to a week, or freeze for longer shelf life. Whether you’re serving it with fresh ahi, sushi rolls, or grilled fish, this sauce will become your new go-to for bold, restaurant-worthy flavors at home.
Ingredients for aloha poke samurai sauce
Nine simple ingredients blend into a bold, restaurant-worthy sauce that transforms any seafood dish.
| Ingredient | Amount | Notes |
|---|---|---|
| Mayonnaise 🥫 | ½ cup | High-quality, full-fat preferred |
| Soy Sauce 🍶 | ¼ cup | Low-sodium preferred |
| Sesame Oil 🫒 | 1 tbsp | Toasted sesame oil for aroma |
| Honey 🍯 | 1 tbsp | Wildflower or clover variety |
| Garlic Cloves 🧄 | 4 cloves | Freshly minced for potency |
| Red Chili Paste 🌶️ | 1 tbsp | Vegan-friendly chili paste |
| Celery Stalks 🧅 | 2 whole | Thinly sliced for celery crowns |
| Toasted Sesame Seeds 🌾 | 1 tbsp | For garnish and texture |
| Rice Vinegar 🍶 | 1 tsp | For brightness and balance |
| Salt 🧂 | ½ tsp | Adjust to taste |
The mayo is the base—Duke’s or Hellmann’s work best for that creamy texture. Grab low-sodium soy sauce from the Asian aisle—it keeps the flavor balanced without overpowering. Toasted sesame oil is a must for that nutty aroma; Trader Joe’s has it pre-toasted, which saves time. Fresh garlic and chili paste are the flavor bombs here—frozen chili paste works in a pinch, but fresh is worth the extra minute. Celery crowns? Thinly slice two stalks (about 2 tbsp) for that satisfying crunch.
No toasted sesame oil? Regular sesame oil plus a pinch of smoked paprika mimics the flavor. Short on honey? Maple syrup at half the amount works, though it’s slightly less floral. The rice vinegar can be swapped for white vinegar or lemon juice if you’re out. For extra heat, add 1/4 tsp of sriracha or gochujang. The celery crowns can be prepped ahead—they’ll keep in the fridge for 3 days wrapped in a damp paper towel.
Mix everything together and let it sit for 10 minutes before serving—flavors meld beautifully. Store in an airtight container in the fridge for up to 1 week or freeze for 3 months. I like to portion it into small jars so it’s ready to grab for quick meals. The celery crowns? Toss them in the sauce right before serving to keep that crisp texture.
Why You'll Love This Recipe
- Five-Ingredient Magic: I swear by this sauce—just mayo, soy sauce, sesame oil, honey, and garlic. That’s it. No fancy gadgets, no last-minute grocery runs. Honestly, I keep all the ingredients stocked just for this.
- Umami Bomb: The garlic hits first—sharp and fresh—then the soy sauce and sesame oil layer in that deep, savory punch. The honey? It’s the secret. One spoonful ties everything together, balancing salty and sweet like a perfect wave.
- Poke’s Best Friend: This sauce is my go-to for poke bowls, but it’s also the star of my lazy takeout nights. Drizzle it over rice, toss it with noodles, or even slather it on a grilled cheese. (Yes, even on a Tuesday night.)
- Leftovers That Last: I make a big batch on Sundays and it’s still good two weeks later. The mayo keeps it creamy, the honey prevents it from separating, and the garlic flavor only gets better with time. My freezer’s full of it—because why not?
Step-by-step instructions for smoky spicy-mayo fusion sauce
Here's how to blend bold flavors into this addictive poke sauce—crispy, creamy, and packed with umami.
👨🍳 Step 1: Mince Garlic and Celery for Maximum Flavor
Start by peeling the 4 cloves garlic and mince them finely using a sharp knife or microplane. You want the pieces almost paste-like—this ensures even distribution and intense flavor. While you're at it, thinly slice the 2 whole celery stalks into paper-thin "crowns." I like to cut them on the bias for extra surface area that'll soak up all those delicious flavors.
Set both aside in separate bowls. The celery will add that signature crunch while the garlic delivers deep, savory notes. Don't skip this step—freshly minced garlic makes all the difference compared to pre-minced or jarred versions. If you're feeling fancy, you can even pulse the garlic in a food processor for a smoother texture.
🍳 Step 2: Whisk Together the Wet Ingredients
In a medium bowl, combine the 0.5 cup mayonnaise, 0.25 cup soy sauce, 1 tbsp sesame oil, 1 tbsp honey, and 1 tbsp red chili paste. Use a whisk or fork to mix vigorously for about 30 seconds until everything is fully incorporated and smooth. The mixture should look like a thick, glossy paste with no streaks of honey or chili paste remaining.
Here's where the magic happens—I like to taste at this stage to check the balance. It should be tangy from the soy sauce, slightly sweet from the honey, and just starting to get that spicy kick from the chili paste. If it's too thick, you can add a splash of water to loosen it up later, but we'll be adding vinegar next which will help thin it naturally.
🥘 Step 3: Fold in Garlic, Celery, and Seasonings
Add the minced garlic and celery crowns to the wet mixture and stir gently to combine. Then sprinkle in the 0.5 tsp salt and 1 tsp rice vinegar. The vinegar adds that bright, tangy note that cuts through the richness of the mayonnaise and balances the sweetness. Give everything one final stir—you're looking for an even distribution where every bite gets that perfect mix of crunch, creaminess, and spice.
Let the sauce sit for 5 minutes at room temperature. This resting period allows all the flavors to meld together beautifully. You'll notice the celery starts to soften slightly and the garlic aroma becomes more pronounced. Don't skip this step—patience here makes the sauce taste even better when you're ready to serve.
🔪 Step 4: Garnish and Serve Immediately
Just before serving, sprinkle the sauce with 1 tbsp toasted sesame seeds. These add a beautiful nutty crunch and visual appeal that makes the dish look even more impressive. Toss the sauce gently to distribute the seeds evenly throughout. The seeds should be scattered on top rather than fully incorporated—this creates that restaurant-quality presentation.
Serve immediately while the celery still has that satisfying crunch. This sauce is best enjoyed fresh, straight from the bowl. If you need to make it ahead, store it in an airtight container in the refrigerator for up to 3 days, but give it a good stir before serving and add a few extra sesame seeds to refresh the texture. The flavors actually improve slightly after resting overnight!
Pro Tips For Making Aloha Poke Samurai Sauce
- MINCE THAT GARLIC: I used to crush the cloves with the flat of my knife—big mistake. For this sauce, finely mince the garlic into a paste with a teaspoon or pulse it in a mini food processor. It blends smoother and doesn’t leave gritty bits that fight with the honey’s sweetness. (Yes, even if you’re impatient like me.)
- BALANCE THE SALT: Soy sauce is already salty, but if you’re using a lighter mayo, you’ll need to adjust. Taste the sauce before adding honey—if it’s flat, a splash of extra soy or a pinch of salt (not both) will wake it up. I learned this the hard way when my first batch tasted bland until I fixed it.
- SLOWLY ADD SESAME OIL: Dump it in all at once and you’ll end up with a bitter, overpowering sauce. Start with half the amount, let it emulsify, then add the rest drop by drop while stirring. The oil should coat the mayo like a whisper, not a shout—this is where the sauce gets its silky depth.
- CHILL BEFORE SERVING: Warmth ruins this sauce faster than you’d think. If you’re making it ahead, refrigerate for at least 30 minutes before tossing with poke. The flavors meld better cold, and the garlic won’t taste sharp. (Your future self will thank you.)
Regional styles of aloha poke samurai sauce
Hawaiian-Inspired Fusion
This sauce blends traditional Hawaiian poke flavors with bold Japanese-inspired umami—a fusion that works perfectly with fresh ahi or spicy tuna rolls. The soy sauce and sesame oil create that signature Japanese depth, while the honey and rice vinegar add a bright, tropical twist.
I often serve this with sushi-grade fish or as a dipping sauce for crispy tempura shrimp. 🌺
West Coast Adaptation
In California, this sauce gets a smoky BBQ kick by adding ½ tsp smoked paprika to the chili paste. The result? A spicy-sweet fusion that pairs beautifully with grilled salmon or seared scallops.
I like to serve it with avocado slices and pickled ginger for a West Coast poke bowl twist. The smokiness cuts through the richness of the mayo beautifully.
Japanese-Inspired Spicy Mayo
For a more authentic Japanese spicy mayo approach, swap the honey for 1 tsp mirin and add ½ tsp grated ginger. This version keeps the celery crowns but reduces the chili paste to ½ tbsp for a milder heat.
It’s perfect for sashimi platters or as a topping for udon noodles. The mirin adds a subtle sweetness that balances the soy perfectly.
Thai-Inspired Heat Boost
Add 1 tsp fish sauce and ½ tsp lime zest for a Thai-inspired twist that’s tangy and umami-rich. The lime zest brightens the sauce, while the fish sauce deepens the flavor.
This version works amazingly with grilled prawns or as a dipping sauce for spring rolls. The heat level stays bold but more complex, with a citrusy finish.
Korean-Inspired Gochujang
For a Korean-inspired version, replace the red chili paste with 1 tbsp gochujang (Korean chili paste) and add ½ tsp grated ginger. The gochujang adds a fermented depth that pairs perfectly with bulgogi-marinated fish or kimchi.
The sauce becomes thicker and more complex, with a slightly sweet and spicy profile that’s addictive.
Crunchy Topping Variations
Swap the celery crowns for thinly sliced scallions or crispy fried shallots for a different texture. I love using toasted coconut flakes for a tropical touch—just sprinkle 1 tbsp on top before serving.
For extra crunch, try crushed wasabi peas (½ tsp) for a spicy kick that’s perfect with sushi. 🌟
Nutrition facts
Frequently asked questions
Can I make this sauce without mayo?
Yes! For a lighter version, replace the mayo with ½ cup Greek yogurt or ¼ cup sour cream for tanginess. For a vegan option, use ¼ cup silken tofu blended until smooth—it adds creaminess without dairy. The texture will be slightly thinner, but the flavor profile stays bold.
How spicy should this sauce be?
The recipe balances heat with sweetness, so it's medium-spicy—like a kick without overwhelming. For milder heat, reduce chili paste to ½ tbsp; for extra fire, add ½ tsp sriracha or cayenne. Taste as you go and adjust to your spice tolerance!
Can I prep the celery crowns ahead?
Prep celery crowns 1-2 days ahead and store them in a sealed container with a damp paper towel. This keeps them crisp. For maximum crunch, add them to the sauce right before serving—otherwise, they’ll soften after 30 minutes in the fridge.
What’s the best way to store leftovers?
Keep sauce in an airtight container in the fridge for up to 1 week. For longer storage, freeze in ice cube trays—perfect for single servings! Thaw overnight in the fridge and stir well before using. The celery crowns won’t survive freezing, so add fresh ones when reheating.
Is this sauce gluten-free?
Only if you use gluten-free soy sauce! Traditional soy sauce contains wheat, so check the label. For a fully gluten-free version, swap soy sauce for coconut aminos (add ½ tsp extra salt to balance flavor). The rest of the ingredients are naturally gluten-free.