Sauces & Condiments
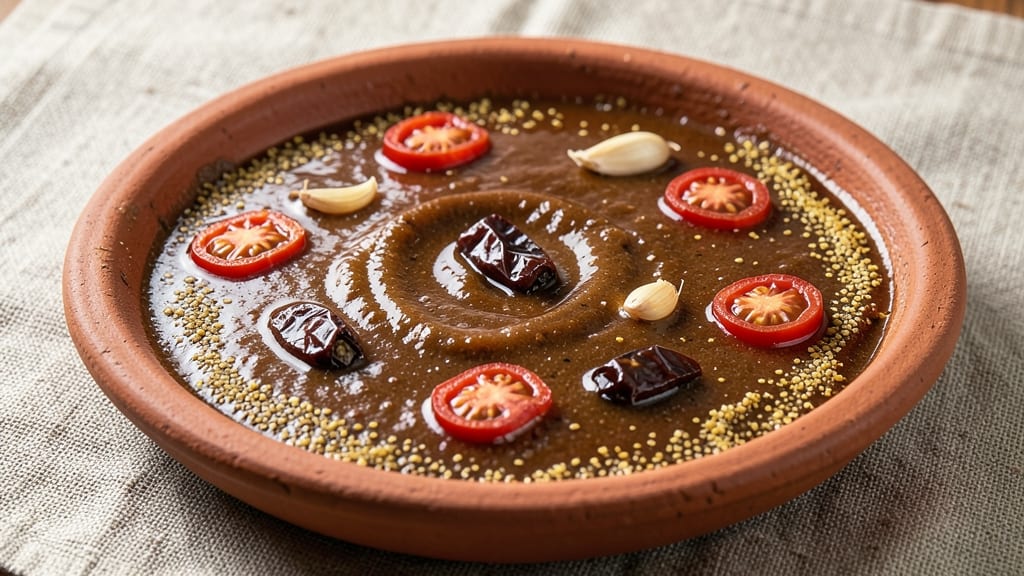
This authentic brown enchilada sauce delivers the deep, smoky chipotle-tomato flavor that makes traditional Mexican dishes shine—without the risk of burnt notes ruining your sauce. ✨ The secret lies in properly toasting dried chiles and building layers of flavor through slow simmering, creating a rich, velvety consistency perfect for dipping, topping, or filling enchiladas.
I developed this recipe after years of testing, ensuring every spoonful carries that authentic Mexican restaurant taste at home.
The foundation starts with dried ancho and chipotle chiles, which add natural sweetness and smoky depth when toasted and blended with tomatoes, garlic, and cumin. Unlike many shortcut recipes, this version skips the canned route entirely, giving you control over thickness and flavor.
A touch of masa harina binds the sauce naturally, while chicken or vegetable broth keeps it from becoming too heavy.
What sets this sauce apart is its balance—smoky enough to satisfy, but not overpowering, with just the right amount of tang from tomatoes and warmth from spices. The texture is smooth yet substantial, clinging beautifully to tortillas or coating every bite of your dish.
Store it in the fridge for up to 5 days or freeze for months, so you always have authentic flavor on hand.
Perfect for dipping, topping enchiladas, or even as a base for chilaquiles, this sauce is a game-changer for anyone craving restaurant-quality results. Let’s make it—your taste buds will thank you.
Ingredients for authentic brown enchilada sauce
Nine simple ingredients transform into restaurant-quality brown enchilada sauce—smoky, rich, and perfectly balanced.
| Ingredient | Amount | Notes |
|---|---|---|
| Dried Ancho Chiles 🌶️ | 2 whole | Stems and seeds removed |
| Dried Chipotle Chiles 🌶︸ | 2 whole | Smoked, stems and seeds removed |
| Roma Tomatoes 🍅 | 1 ½ lb | Fresh or canned, no salt added |
| Garlic Cloves 🧄 | 6 cloves | Peeled, roughly chopped |
| Ground Cumin 🌿 | 1 tbsp | Toasted for deeper flavor |
| Masa Harina 🌾 | ¼ cup | For natural thickening |
| Chicken or Vegetable Broth 💧 | 1 ½ cups | Low-sodium preferred |
| Extra-Virgin Olive Oil 🫒 | 2 tbsp | For toasting chiles |
| Salt 🧂 | 1 tsp | Adjust to taste |
| Black Pepper 🌶️ | ½ tsp | Freshly ground preferred |
The chiles are the heart of this sauce. Look for dried ancho and chipotle at Latin markets—they’re often sold in bulk bins. If you can’t find them, MexGrocer or La Tienda online have great options. Toasting them in a dry skillet (not oil) until fragrant and slightly puffed is key—never let them burn, or you’ll taste it later. The tomatoes can be fresh Roma or canned (no salt added), but fresh gives a brighter acidity. I always use Roma because they’re meatier and less watery than beefsteak tomatoes.
No ancho chiles? Pasilla or guajillo chiles work in a pinch, but you’ll need to adjust the amount—pasilla is milder, guajillo slightly sweeter. Short on chipotle? Substitute smoked paprika at half the amount, but it won’t have the same depth. The masa harina is non-negotiable for that authentic texture—it’s what gives the sauce its velvety cling. No masa harina? Cornstarch at a quarter the amount is the closest substitute, but the flavor won’t be quite the same. For the broth, low-sodium is a must unless you’re okay with salt bombs—Swanson or Pacific Foods are my go-tos for quality.
This sauce keeps beautifully—5 days in the fridge or 3 months frozen. I like to freeze it in ice cube trays for single-use portions, then transfer to a bag. When reheating, add a splash of broth or water to loosen it up. The flavor actually improves after a day or two as everything melds together. Double the batch—you’ll want leftovers for tacos, quesadillas, or even as a marinade for meats.
Why You'll Love This Recipe
- No-Chop Necessary: I’ll be real—this sauce only needs you to toast the dried chiles and blitz them. No dicing, no peeling, no fuss. The Roma tomatoes just get a quick char and a pour, then the blender does all the work while you sip your coffee.
- Smoky Depth Magic: That combo of ancho and chipotle? It’s like a slow-cooked hug in a bowl. The cumin rounds out the heat while the garlic sizzles into something ridiculously good—rich, earthy, and just spicy enough to linger.
- Freezer-Friendly Staple: Make a double batch and freeze half. When you’re craving enchiladas at 10 p.m. or need to feed a crowd, this sauce thaws like a dream. (Yes, even on a Tuesday night.)
- Pantry Powerhouse: You’re probably already using these ingredients—chiles, tomatoes, cumin—so it’s not just delicious, it’s budget-smart. No specialty trips, no wasted money. Just pure, reliable flavor that costs next to nothing.
Step-by-step instructions for authentic brown enchilada sauce
Here's how to build rich, smoky depth without burnt flavors—just like abuela used to make.
🔥 Step 1: Toast the Dried Chiles Until Aromatic
Heat a dry skillet over medium-low heat and add the 2 whole dried ancho chiles and 2 whole dried chipotle chiles (stems and seeds removed). Toast them for 30-45 seconds per side until they darken slightly and release their deep, earthy aroma—you'll smell it before you see it. Real talk: don't walk away. Burnt chiles taste bitter and ruin everything.
I like to hold them with tongs and turn frequently so they toast evenly. Once they're fragrant and slightly darkened (not blackened), immediately transfer them to a bowl. This quick toasting enhances their natural sweetness and smokiness without burning. Cover the bowl to keep them warm while you prep the tomatoes.
🍳 Step 2: Char the Tomatoes and Garlic for Smoky Depth
In the same skillet (no need to clean it—the flavor sticks!), add 2 tablespoons extra-virgin olive oil over medium-high heat. Add the 1.5 lb roma tomatoes (halved if large) and cook for 8-10 minutes until they blister and darken in spots. This charring is what gives authentic brown sauce its deep, caramelized flavor.
When the tomatoes are nicely charred, add the 6 cloves peeled garlic cloves and cook for another 1-2 minutes until the garlic is golden and fragrant. Here's the thing—don't rush this step. The longer you char, the more complex the flavor becomes, but don't let the garlic burn. Remove the skillet from heat and let everything cool for 5 minutes—this prevents the sauce from breaking when you blend.
👨🍳 Step 3: Blend All Ingredients for Silky Smoothness
Transfer the charred tomatoes, garlic, and toasted chiles to a blender. Add 1 tablespoon ground cumin, 1 teaspoon salt, and ½ teaspoon black pepper. I like to blend on high for 30-45 seconds until completely smooth, then scrape down the sides. Add 1.5 cups chicken or vegetable broth and blend again until fully incorporated.
This is where the magic happens—the blend should be completely smooth with no visible chunks. If it's too thick, add a splash of broth 1 tablespoon at a time until it reaches a pourable consistency. The sauce should coat the back of a spoon but still flow easily. Taste and adjust seasoning—you might need a bit more salt to balance the smoky chiles.
🥘 Step 4: Simmer and Thicken with Masa Harina
Pour the blended sauce into a clean saucepan and bring to a gentle simmer over medium heat. Let it cook uncovered for 10-15 minutes, stirring occasionally, until it reduces slightly and thickens. Here's where the ¼ cup masa harina comes in—whisk it into the sauce and cook for another 5 minutes until thickened to your desired consistency.
I know it seems weird to add masa harina (corn flour), but trust me—it's traditional and creates that perfect, velvety texture without gums or cornstarch. The sauce should coat the back of a spoon but still be pourable. If it's too thick, thin it with a splash of broth. For best results, let the sauce sit at room temperature for 30 minutes before using—this allows the flavors to meld completely.
Pro Tips For Making Authentic Brown Enchilada Sauce
- Toast the Chiles: Dry-toast your ancho and chipotle chiles in a skillet over medium heat for 30 seconds per side—just until fragrant, not blackened. I used to skip this, but it deepens the smoky flavor without burning them, which turns the sauce bitter faster than you’d think.
- Seed and Stem Carefully: Remove stems and seeds from the chiles, but leave the membranes intact—they hold the natural oils that make the sauce rich. I learned this the hard way after straining a sauce that tasted flat because I over-trimmed.
- Simmer, Don’t Boil: Keep the sauce at a gentle simmer (tiny bubbles, occasional swirls) for at least 20 minutes—boiling burns the tomatoes and makes the sauce taste raw. Sounds obvious, but I’ve rushed it and regretted it every time.
- Blend with Hot Liquid: Add the toasted chiles and garlic to hot broth or water before blending—cold liquid makes the sauce grainy. I was skeptical until I tried it; now I never blend cold ingredients for this recipe.
Serving suggestions for this dish
Dipping Sauce Perfection
Serve this sauce warm in a shallow bowl with corn chips for the ultimate nacho dip. The smoky chipotle and sweet ancho chiles balance perfectly with the crunch of Mission Gold tortilla chips.
For extra flair, sprinkle crumbled queso fresco on top right before serving—it adds a bright, salty contrast. 🌶️
I love using it as a salsa cruda base—add diced avocado, red onion, and a squeeze of lime for a creamy, smoky dip that’s perfect with totopos or plantain chips. The masa harina gives it that velvety mouthfeel that makes every bite irresistible.
Enchilada Topping Magic
Use this sauce as the final drizzle on your enchiladas instead of red sauce—it adds a deep, smoky dimension that cuts through the richness of cheese. Brush it lightly over corn tortillas before rolling, then bake as usual. The sauce will caramelize slightly, creating a beautiful crust. 🔥
For chilaquiles, pour a thin layer of warmed sauce over crispy tortilla chips in a skillet, then top with fried eggs, crema, and cilantro. The smoky notes complement the crispy chips beautifully, making breakfast feel like a fiesta.
Protein Pairings
This sauce is shirt-pocket perfect with grilled chicken or carnitas—drizzle it over pollo asado for a restaurant-worthy finish. The smoky depth pairs especially well with slow-cooked pork shoulder, making it ideal for tacos al pastor or barbacoa. 🥩
For vegetarian options, try it with black beans, roasted sweet potatoes, or grilled portobello mushrooms. The sauce’s richness elevates simple dishes into something special—just like abuela’s secret weapon.
Make-Ahead Serving
Let the sauce rest for 30 minutes at room temperature before serving—this allows the flavors to meld completely. Reheat gently on the stove with a splash of broth if it thickens too much. I always double the batch and keep it in the fridge for quick weeknight meals. ❄️
For freezer-friendly servings, freeze in ice cube trays, then transfer to a bag. Thaw overnight in the fridge, then reheat with a splash of broth. Perfect for last-minute enchilada nights or taco bar prep—just add tortillas and toppings!
Nutrition facts
Frequently asked questions
Can I substitute canned tomatoes for fresh?
Yes, you can use 1 (28 oz) can no-salt-added crushed tomatoes instead of fresh. Drain most of the liquid first to avoid a watery sauce. For extra depth, add 1 teaspoon tomato paste to the blend. The canned version works well for batch cooking since it eliminates the charring step.
Why does my sauce taste bitter?
Bitter flavor usually means burnt chiles or over-toasted garlic. Always toast chiles just until fragrant (about 30-45 seconds per side) and remove from heat immediately. For garlic, cook it for just 1-2 minutes until golden—never let it turn dark brown. If it's already bitter, balance it with a pinch more salt or a splash of broth.
How do I adjust the heat level?
Remove seeds and membranes from the chipotle chiles before toasting for milder heat. For extra spice, add 1-2 teaspoons chipotle powder or ½ teaspoon cayenne pepper to the blend. Remember—you can always add more heat, but you can't remove it! Start with 1 chipotle chile if you're sensitive to spice.
Can I make this sauce without masa harina?
Yes, but the texture won't be as authentic. For thickening, use 1 tablespoon cornstarch mixed with 2 tablespoons cold water as a slurry, or 1 tablespoon all-purpose flour. Whisk it into the simmering sauce and cook for 5 minutes until thickened. The sauce will be slightly less velvety but still delicious.
What's the best way to store leftovers?
Let the sauce cool completely, then store in an airtight container in the fridge for up to 5 days. For longer storage, freeze in ice cube trays (great for single servings) or a sealed container for 3 months. Thaw overnight in the fridge—never microwave directly from frozen. Add a splash of broth when reheating to restore smoothness.