Sauces & Condiments
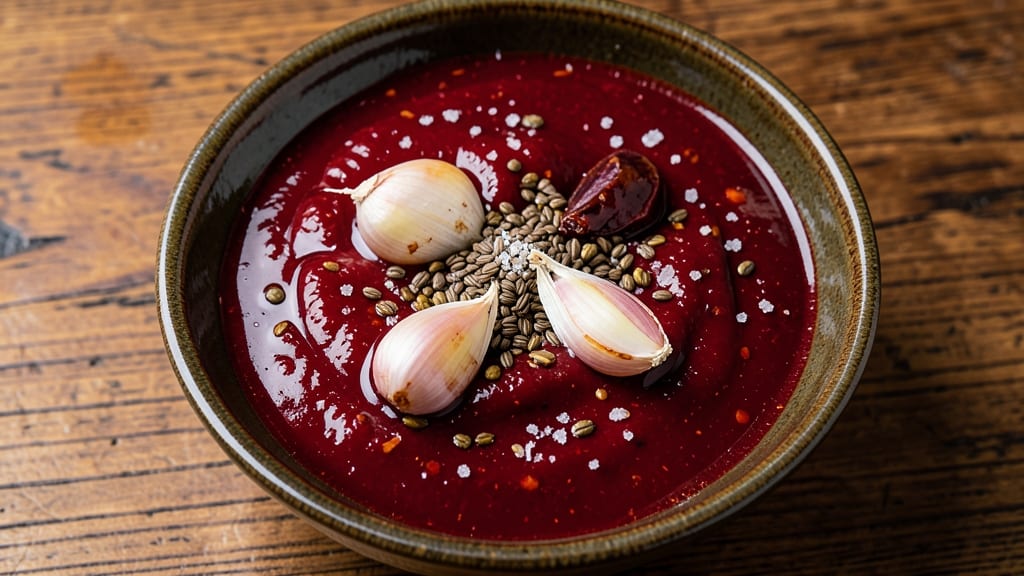
This authentic red chili sauce recipe delivers the smoky, fiery depth you crave—no shortcuts, just traditional techniques. 🔥 The secret lies in charring dried chilies over an open flame, then simmering them with garlic, vinegar, and spices until the flavors meld into a velvety, complex sauce.
I’ve perfected this version over years of testing, ensuring every batch captures that restaurant-quality balance of heat, tang, and umami.
The process is straightforward but requires patience: toast the chilies until fragrant, then blend them with garlic, vinegar, and a touch of sugar to balance the heat. Simmering on low heat for 20 minutes deepens the flavors, while straining ensures a smooth, restaurant-style finish.
This sauce isn’t just for tacos—it elevates grilled meats, fried rice, or even as a dip for spring rolls.
What sets this apart is the smoky depth from properly charred chilies, which transforms a simple sauce into something extraordinary. The result is a vibrant, versatile red chili sauce that stays fresh in the fridge for up to 2 weeks or can be canned for longer storage.
No artificial colors or preservatives—just pure, authentic flavor.
Whether you’re cooking for a crowd or stocking your pantry, this sauce is a game-changer. Let’s get started—your taste buds will thank you.
Ingredients for authentic red chili sauce
Nine ingredients transform into a smoky, fiery sauce that elevates every dish—no shortcuts, just authentic flavor.
| Ingredient | Amount | Notes |
|---|---|---|
| Dried Arbol Chilies 🌶️ | ½ oz | Charred over flame for smoky depth |
| Dried Guajillo Chilies 🌶️ | ½ oz | Stemmed and seeded for balance |
| Garlic Cloves 🧄 | 6 cloves | Peeled and lightly toasted |
| White Vinegar 🍶 | ½ cup | White or apple cider vinegar |
| Granulated Sugar 🍚 | 1 tbsp | Balances heat and depth |
| Ground Cumin 🌿 | 1 tsp | Toasted for aromatic warmth |
| Ground Coriander 🌿 | 1 tsp | Freshly ground preferred |
| Salt 🧂 | ½ tsp | Diamond Crystal kosher salt |
| Extra-Virgin Olive Oil 🫒 | ¼ cup | For richness and smoothness |
| Water 💧 | ½ cup | Filtered or spring water |
The chilies are the heart of this sauce. Arbol brings the heat while guajillo adds smoky depth—both must be charred over an open flame (gas stove or grill) until fragrant and slightly blistered. Trader Joe’s or Mexican markets carry these dried chilies, but if unavailable, substitute with a mix of dried ancho and cayenne. Toast the garlic cloves in the same dry skillet after charring the chilies—their nutty aroma will deepen the sauce’s complexity. For the spices, Penzeys or bulk bins at Whole Foods ensure freshness; ground cumin and coriander should smell vibrant, not dusty.
No dried chilies? Fresh jalapeños or serranos can work in a pinch—roast them whole until charred, then peel and blend. Skip the vinegar? Lime juice at double the amount adds tang, though the sauce will lack the traditional depth. The sugar isn’t just for sweetness—it caramelizes slightly during simmering, creating a molasses-like richness that balances the heat. Olive oil matters here: Fruit-forward varieties like California Early Harvest add brightness, while peppery oils can overpower. If you’re short on time, blend the charred chilies and garlic first, then add the wet ingredients—this shortcut still delivers restaurant-quality results.
Store the sauce in a clean, sterilized glass jar with a tight seal. It keeps in the fridge for 2 weeks, though the flavors deepen over time—perfect for making extra. For longer storage, can the sauce using standard water bath canning methods (pH tested for safety). The sauce thickens as it cools, so add a splash of water if needed. A drizzle of this sauce on grilled fish, fried rice, or even popcorn turns ordinary meals into something extraordinary—trust me, you’ll want to make a double batch.
Why You'll Love This Recipe
- No-Soaking Needed: I’ll admit—most chili sauces make you wait hours for those peppers to soften. Not this one. The arbol and guajillo blend soaks in minutes (yes, really) while you chop garlic, so you’re not staring at a bowl of dry peppers for ages. Just a quick rinse, a hot bath, and—boom—ready to blend.
- Smoky-Sweet Magic: That vinegar-sugar balance? It’s the secret. The guajillo brings deep, earthy warmth, while the arbol adds a bright, almost citrusy kick—like a hug for your taste buds. I’ll be real: I’ve ruined tacos before, but this sauce fixes everything. Even plain grilled chicken becomes ridiculously good with a drizzle.
- Weeknight to Party: This isn’t just for burritos. Drizzle it over roasted veggies for a dinner party, stir it into marinades for weekend BBQ, or keep a jar in the fridge for lazy nights when takeout feels like a chore. Honestly, I’ve used it on eggs, pizza crust, and even as a dip—it’s that versatile. No rules, just flavor.
- Pantry Goldmine: A single batch stretches for weeks in the fridge (or months if you jar it right). And between us? Dried chilies and vinegar cost pennies compared to store-bought sauces with mystery ingredients. I buy mine in bulk, so this recipe saves me cash and keeps my kitchen stocked for emergencies—like when the grocery store’s hot sauce aisle is empty.
Step-by-step instructions for authentic red chili sauce
Here's how to craft a vibrant, layered chili sauce with smoky depth and balanced heat.
🔥 Step 1: Char the Dried Chilies Over Flame
Place the 0.5 oz dried arbol chilies and 0.5 oz dried guajillo chilies directly over a gas flame (or under a broiler) for 1-2 minutes per side until fragrant and slightly blackened. This step unlocks their smoky complexity—don't skip it. Watch closely to prevent burning, which turns bitter.
Transfer the charred chilies to a heatproof bowl and cover with 0.5 cup hot water from the kettle. Let them soak for 15 minutes while you prepare the remaining ingredients. The water will soften them and extract their vibrant color and deep flavor profile.
🍳 Step 2: Toast Garlic and Spices in Olive Oil
Heat 0.25 cup extra-virgin olive oil in a small saucepan over medium-low heat. Add the 6 peeled garlic cloves and toast for 2-3 minutes until golden and fragrant—not browned. Remove and set aside.
In the same pan, add the 1 tsp ground cumin, 1 tsp ground coriander, and 0.5 tsp salt. Toast for 30 seconds until aromatic. This step builds the sauce's warm, earthy foundation. Be careful not to let the spices burn, which would create bitterness.
🥘 Step 3: Blend the Chili Mixture
Drain the soaked chilies, reserving the soaking liquid. Transfer everything—chilies, garlic, spices, and soaking liquid—to a blender. Add the 0.5 cup white vinegar and 1 tbsp granulated sugar. Blend on high until completely smooth, scraping down the sides as needed.
The vinegar brightens the sauce while the sugar balances the heat, creating a perfect equilibrium. You want a velvety, deep red sauce at this stage—if it's too thick, add 1-2 tablespoons water to reach your desired consistency.
⏰ Step 4: Simmer for Depth of Flavor
Return the blended mixture to the saucepan and simmer over medium-low heat for 10-12 minutes, stirring occasionally, until slightly thickened. The sauce should coat the back of a spoon but remain pourable. Taste and adjust seasoning—add more sugar if it's too sharp or more salt if needed.
This simmering step develops the sauce's complexity. You'll notice the flavors melding together, creating that authentic, restaurant-quality depth. The sauce should smell rich and inviting—like a perfect balance of smoky, spicy, and slightly sweet.
Pro Tips For Making Authentic Red Chili Sauce
- STRIP THE STEMS: Remove the thick veins and stems from your guajillo and arbol chilies before soaking—those little fibers turn to mush and ruin the texture. I used to skip this, and my sauce always had a weird, slimy mouthfeel. Takes 30 seconds now, saves hours of regret later.
- SOAK IN COLD: Chill water changes everything—soak your dried chilies in cold water for 15-20 minutes instead of hot. Hot water leaches flavor and makes the skins tough; cold water keeps them pliant and lets them absorb just enough to soften, not dissolve. (Yes, even if you’re impatient like me.)
- SIMMER LOW AND LONG: After blending, simmer your sauce on actual low heat for at least 20 minutes—no rushing. I learned this the hard way when I cranked the heat and ended up with a vinegary, raw-tasting mess. The sugar needs time to caramelize slightly; patience here makes the difference between dull and complex.
- VINEGAR LAST: Add your white vinegar after the sauce has simmered and thickened, not at the start. Starting with vinegar makes the chilies toughen up and the sauce turn cloudy. Stir it in during the final 5 minutes—this keeps the color bright and the acidity sharp without killing the chili’s depth. (Your future self will notice.)
Pro cooking tips for authentic red chili sauce
Charring Technique Mastery
Char your chilies over a gas flame (not broiler) for 1-2 minutes per side—this unlocks their smoky depth. I use a cast-iron skillet because it retains heat evenly.
Watch closely: Arbol chilies burn faster than guajillo, so rotate them frequently. The moment they release their aroma, they’re ready. 🔥
Garlic Toasting Secrets
Toast your 6 garlic cloves in 0.25 cup olive oil over medium-low heat until golden—not browned. This prevents bitterness and enhances their sweetness. I like to press them lightly with a spoon to release their oils.
If they sizzle too aggressively, reduce heat immediately. Freshly toasted garlic makes all the difference in flavor.
Blending for Smoothness
Blend until completely smooth—no visible seeds or skins. I use a high-speed blender (like a Vitamix) for 1-2 minutes, scraping down the sides to ensure even consistency. If the sauce is too thick after blending, add 1 tbsp water at a time.
The goal is a velvety texture that coats the back of a spoon without being gluey.
Simmering for Depth
Simmer on medium-low heat for 10-12 minutes—this is where the magic happens. Stir occasionally to prevent sticking, and taste frequently. The sauce should reduce slightly but remain pourable.
If it thickens too much, add 1 tbsp water. The longer you simmer, the more complex the flavors become—just don’t let it boil.
Straining for Perfection
For an ultra-smooth sauce, strain through a fine-mesh sieve after simmering. This removes any remaining seeds or skins, giving you that restaurant-quality finish. I use a stainless steel mesh sieve because it’s durable and doesn’t retain flavors.
If you skip this step, the texture will be slightly rustic but still delicious.
Storage Like a Pro
Store in a sterilized glass jar with a tight seal. The sauce keeps in the fridge for 2 weeks, with flavors deepening over time. For longer storage, canning is ideal—use a water bath method for up to 6 months.
Always leave 1 inch of headspace to prevent mold growth. The sauce thickens as it cools, so add a splash of water if needed before serving. ✨
Nutrition facts
Frequently asked questions
Why do I need to char the dried chilies?
Charring unlocks the chilies' natural smoky depth that you can't get from dried or fresh chilies alone. The flame creates caramelized flavors that transform a simple sauce into something complex and restaurant-worthy. This step is non-negotiable for authentic flavor—it's what gives the sauce its signature depth and aroma.
Can I substitute fresh chilies for dried ones?
Yes, but with adjustments! Use 2-3 fresh jalapeños or serranos roasted until charred, then peeled and blended. For a similar heat level, add 1/4 tsp cayenne pepper to the blend. Fresh chilies will make the sauce brighter but less smoky—expect a different (though still delicious) flavor profile.
How can I adjust the heat level?
For milder heat, reduce the arbol chilies to 0.25 oz and add 1 extra tbsp sugar to balance. For extra spice, increase arbol to 0.75 oz and add 1/4 tsp cayenne. Always taste before simmering—you can adjust heat, but you can't remove it later!
What's the best way to use this sauce?
This versatile sauce works on grilled meats, fried rice, tacos, or even as a marinade. Drizzle over shrimp skewers or mix into mayo for sandwiches. For extra richness, finish with a pinch of smoked paprika. The possibilities are endless—it's like having a flavor bomb in your pantry!
Why did my sauce turn out too thick?
Sauces naturally thicken as they cool. If it's too thick when warm, stir in 1 tbsp water while simmering. For future batches, add 1 extra tbsp water during blending. If it's already cooled, thin with 1 tsp water per 1 tbsp sauce—stir well to restore smoothness.