Sauces & Condiments
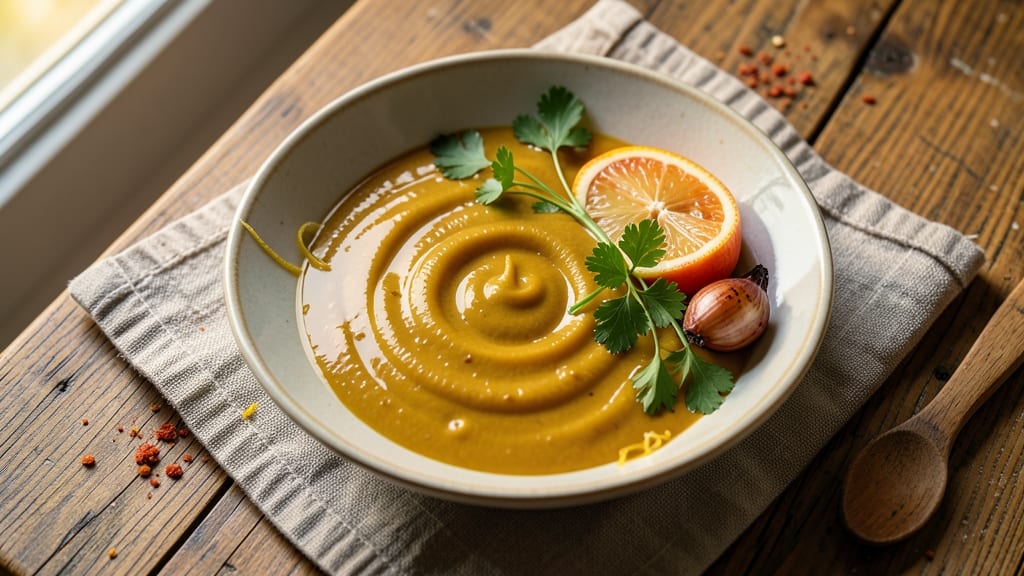
This basic aioli sauce recipe transforms simple ingredients into velvety, garlicky perfection that elevates everything from fries to grilled fish. The secret lies in emulsifying egg yolks and olive oil, creating a rich, creamy sauce with just a hint of tangy lemon.
I’ve perfected this version over years of testing—no shortcuts, just foolproof technique for restaurant-quality results at home.
The foundation starts with raw garlic, which infuses the sauce with bold, aromatic flavor without overpowering. A touch of Dijon mustard acts as an emulsifier, ensuring the sauce stays smooth and stable.
What makes this recipe truly special is how versatile it is—use it as a dip, sandwich spread, or finishing sauce for seafood and vegetables. The process is straightforward but requires patience for the perfect emulsion.
Once you master the technique, you’ll achieve a sauce that’s creamy yet light, with a delicate balance of garlic, lemon, and olive oil. The key is adding the oil slowly while whisking vigorously, which prevents separation and creates that signature silky texture.
Store any leftovers in an airtight container in the refrigerator for up to 5 days, though it rarely lasts that long.
For variations, try roasting the garlic for a sweeter, deeper flavor or adding fresh herbs like dill or parsley. A splash of hot sauce can introduce a subtle kick, while smoked paprika adds warmth.
This aioli is the ultimate blank canvas—simple enough for beginners but refined enough for experienced cooks. Let’s get started!
Ingredients for basic aioli sauce
Eight essential ingredients for velvety, restaurant-quality aioli that transforms any dish.
| Ingredient | Amount | Notes |
|---|---|---|
| Large Egg Yolks 🥚 | 2 whole | Fresh, room-temperature preferred |
| Extra-Virgin Olive Oil 🫒 | 1 cup | High-quality, fruity variety |
| Garlic Cloves 🧄 | 2 whole | Fresh, peeled, minced finely |
| Dijon Mustard 🍯 | 1 tbsp | For stable emulsion |
| Fresh Lemon Juice 🍋 | 1 tbsp | Bright, freshly squeezed |
| Salt 🧂 | ½ tsp | Diamond Crystal kosher |
| Ground Black Pepper 🌶️ | ¼ tsp | Freshly ground preferred |
| Ice Water 💧 | 1 tbsp | For emulsion stability |
The egg yolks are non-negotiable—freshness matters. Trader Joe's and Whole Foods carry high-quality eggs, but any store's freshest carton works. Room temperature yolks emulsify better, so let them sit for 10 minutes if straight from the fridge. The garlic should be freshly minced—pre-minced jars lack punch. For extra flavor depth, roast the garlic cloves (375°F for 20 minutes) before mincing, though raw works perfectly fine for classic aioli. The olive oil must be extra-virgin—cheap oil creates a greasy sauce, not creamy.
No Dijon mustard? Yellow mustard at half the amount works, though the flavor differs slightly. Short on lemon juice? White wine vinegar adds brightness, but reduce to 0.5 tbsp. The ice water is crucial—it stabilizes the emulsion and prevents curdling. If you accidentally add oil too quickly, a splash of ice water can often rescue the sauce. For a milder garlic flavor, reduce to 1 clove and add an extra 0.5 tbsp of lemon juice. The salt should be kosher—table salt over-salts due to its finer grain. Store-bought aioli mixes? Skip them—homemade emulsifies perfectly every time.
Aioli separates when cold, so always serve it at room temperature. Store in an airtight container with a thin layer of olive oil on top to preserve freshness. Keeps for 5 days in the fridge, though flavor peaks within 2 days. For longer storage, freeze in ice cube trays—thaw by whisking under warm water. The sauce thickens when chilled, so thin with a splash of water or lemon juice before serving. Double the recipe for parties—this aioli disappears faster than you'd think.
Why You'll Love This Recipe
- No-Fuss Whisking: I swear by this—just yolks, oil, and a little elbow grease. No blenders, no straining, just smooth magic in under 10 minutes. Honestly, the hardest part is waiting for the oil to warm up properly.
- Garlic Kiss: That raw garlic and lemon cut through everything like a bright, zesty hug. The Dijon mustard adds this sneaky depth—creamy but never boring, with a little tang that makes it ridiculously good on fries or grilled fish.
- Dip Everything: Between us, this sauce is my lazy genius move. Slather it on sandwiches, drizzle it over roasted veggies, or use it as a base for marinades. (Yes, even on a Tuesday night.) It’s the one sauce that does it all without fuss.
- Leftovers That Last: Make a big batch—it keeps for days in the fridge and tastes just as fresh. I’ll be real: I’ve had this sauce linger for a week, and it’s still the star of whatever I toss it on. Budget-friendly? Absolutely. Waste-free? Even better.
Step-by-step instructions for homemade aioli sauce
Master this classic emulsion technique for velvety, garlicky perfection every time.
Prepare the Garlic-Mustard Base
In a medium bowl, whisk together the 2 whole large egg yolks, 1 tablespoon Dijon mustard, 1 tablespoon fresh lemon juice, ½ teaspoon salt, and ¼ teaspoon ground black pepper until completely smooth. The mustard acts as an emulsifier, helping the oil bind with the yolks. I like to use a fork first to break up any lumps, then switch to a whisk for about 30 seconds to create a uniform base.
Here's the thing—this step is non-negotiable. The acidity from the lemon juice and the mustard's tang are what stabilize the emulsion. If you skip this, your aioli will break when you add the oil. Also, make sure your egg yolks are at room temperature for a smoother final texture.
Gradually Incorporate the Olive Oil
With the bowl positioned over a double boiler (or a heatproof bowl set over a pot of barely simmering water), begin adding the 1 cup extra-virgin olive oil very slowly—just 1 teaspoon at a time. Whisk continuously for 10-15 seconds after each addition. This gradual incorporation is what creates the creamy emulsion. If you add the oil too quickly, the mixture will curdle and separate.
You'll notice the mixture transform from a pale yellow into a thick, creamy sauce as the oil emulsifies. The key is patience—don't rush this process. If the mixture starts to thicken too much, you can add 1 teaspoon of ice water to loosen it slightly. This is where the ice water comes into play, ensuring stability.
Finish with Finely Minced Garlic
Once all the oil is incorporated and the aioli reaches a thick, mayonnaise-like consistency, remove the bowl from the heat. Stir in the 2 whole finely minced garlic cloves and continue whisking for another 30 seconds to distribute the flavor evenly. The garlic should dissolve completely into the sauce, creating a smooth, garlicky base.
This is the moment that matters: the garlic should infuse the aioli without any graininess. If you notice any lumps, strain the sauce through a fine-mesh sieve to achieve a silky texture. Taste and adjust the seasoning if needed—you might want to add a pinch more salt or a splash of lemon juice for brightness.
Chill and Serve
Transfer the aioli to a clean glass jar or airtight container and refrigerate for at least 30 minutes before serving. Chilling allows the flavors to meld and the emulsion to stabilize further. The sauce should thicken slightly as it cools, achieving that perfect creamy consistency.
When ready to serve, give the aioli a good stir—it may have separated slightly during chilling, but it should come back together smoothly. This sauce is incredibly versatile: drizzle it over grilled fish, use it as a dip for fries, or spread it on sandwiches. The beauty of homemade aioli is its adaptability—you control the flavor and texture.
Pro Tips For Making Basic Aioli Sauce
- WARM THE YOLKS FIRST: I learned this the hard way—cold yolks and hot oil don’t mix well. Whisk your yolks in a heatproof bowl over barely simmering water (a double boiler) for 2-3 minutes until they’re warm but not scrambled. This keeps them silky when the oil hits.
- MINCE GARLIC FINE: No food processor? Use a knife. Smash each clove flat with the heel of your knife, then slice into paper-thin shreds. This releases more flavor without burning. (Yes, even if you’re impatient like me—just don’t rush the mincing.)
- SLOWLY EMULSIFY: Drizzle the oil in very slowly at first—about 1 drop per second—while whisking like your life depends on it. Once it thickens, you can speed up, but that initial patience is what keeps it from breaking. (Your future self will thank you.)
- USE LEMON ZEST: Skip the extra juice and add a fine zest of lemon peel along with the juice. The oils in the zest brighten the sauce without adding moisture. (Does it look weird? Yes. Does it work? Every single time.)
Make-ahead tips for this basic aioli sauce
Prep Ahead Ingredients
Mince the 2 garlic cloves and whisk the 2 egg yolks with all other ingredients except the olive oil 1 day ahead. Store this base mixture in an airtight container in the fridge.
When ready to make the aioli, simply add the olive oil using the same slow emulsification method. This saves 10 minutes of prep time—perfect for busy weeknights! 📅
Double-Batch Strategy
Make a double batch (using 4 egg yolks and 2 cups olive oil) and store in two separate 8-ounce glass jars in the fridge. This ensures you always have aioli ready for 5 days without worrying about leftovers.
I label the jars with the date to track freshness—trust me, it disappears fast! 💡
Freezer-Friendly Cubes
Portion the aioli into 1-ounce ice cube trays and freeze. Once solid, pop out the cubes and transfer to a ziplock bag. Thaw by whisking under warm water for 30 seconds—no texture loss! This method works especially well for aioli variations like roasted garlic or herb-infused versions. 🥶
Oil Layering Hack
When storing leftovers, always add a ¼-inch layer of olive oil on top before sealing the container. This prevents oxidation and keeps the sauce fresh for 3 extra days. I use a squeeze bottle to drizzle the oil evenly—it’s a game-changer for maintaining that velvety texture. 🫒
Room-Temp Revival
If your refrigerated aioli thickens too much, whisk in 1 teaspoon warm water or lemon juice to restore smoothness. For cold aioli, let it sit at room temperature for 15 minutes before serving—it’ll regain that perfect creamy consistency. This trick works every time, even with older batches. ✨
Herb-Fresh Additions
Fold in 1 tablespoon chopped fresh herbs (like parsley or dill) right before serving to keep them vibrant. Store these separately and mix just before using to prevent wilting. I keep a small jar of chopped herbs in the fridge for quick aioli upgrades—it’s my secret for restaurant-quality flavor. 🌿
Nutrition facts
Frequently asked questions
Why does my aioli sauce sometimes separate?
Separation happens when oil is added too quickly or the ingredients aren't properly emulsified. The key is adding oil 1 teaspoon at a time while whisking constantly. If it breaks, whisk in 1 teaspoon ice water to stabilize it. Always use room-temperature yolks and high-quality olive oil for the best results.
Can I make aioli without egg yolks?
Yes! For a vegan version, replace yolks with 2 tablespoons neutral oil and 2 tablespoons aquafaba (chickpea brine) or ¼ cup silken tofu. Blend until smooth, then slowly add ½ cup olive oil while whisking. The texture will be slightly different but still delicious.
How do I know when the aioli is fully emulsified?
You'll see it transform from pale yellow to thick, creamy, and glossy—like mayonnaise. When it holds its shape on a spoon without dripping, it's ready. If it's too thin, add 1 more tablespoon oil*; if too thick, whisk in ½ teaspoon water.
What's the best way to store leftover aioli?
Keep it in an airtight container with a thin layer of olive oil on top to preserve freshness. It lasts 5 days in the fridge. For longer storage, freeze in ice cube trays—thaw by whisking under warm water for 30 seconds*.
Can I use this aioli as a marinade?
Not recommended—aioli contains raw egg, which can cause foodborne illness when used on raw proteins. Instead, use it as a finishing sauce (after cooking) or for cooked dishes like grilled fish or veggies. For marinades, try a garlic-lemon oil blend instead.