Sauces & Condiments
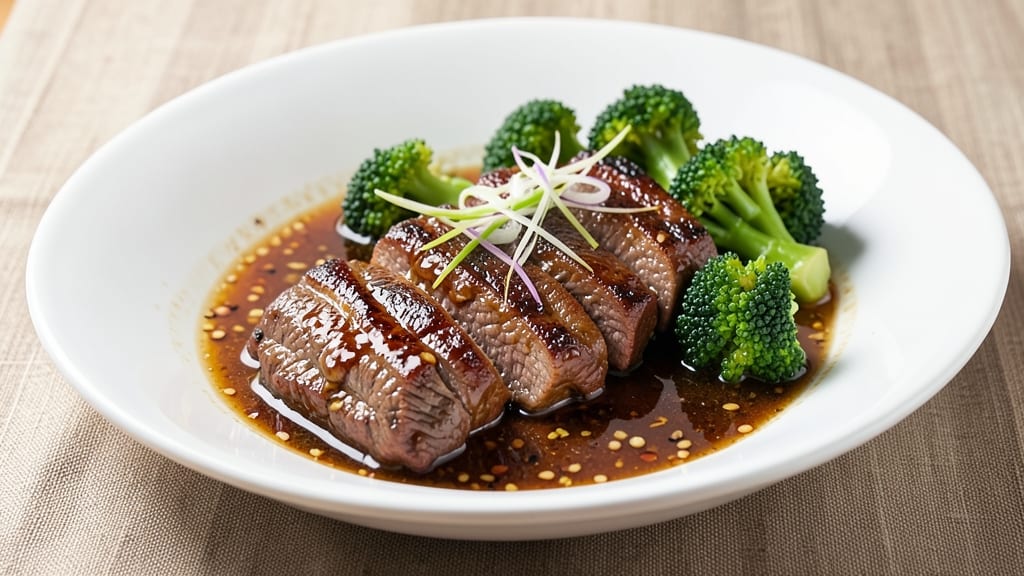
This authentic beef and broccoli sauce recipe delivers the rich, umami-packed flavor that elevates wok-fried beef and broccoli to restaurant-quality perfection. The secret lies in balancing oyster sauce, soy sauce, and a touch of sugar to create a glossy, velvety glaze that clings to every bite.
I developed this sauce after years of testing—it’s the one my family requests every time we order takeout, now made at home.
The sauce builds flavor through gentle simmering, allowing the aromatics—garlic, ginger, and scallions—to meld into a fragrant base before the soy and oyster sauces deepen the richness. A splash of cornstarch slurry at the end transforms the sauce into a silky, cling-coat consistency that’s impossible to resist.
What makes this version truly authentic is the harmony of salty, sweet, and umami notes, achieved without overpowering the natural taste of the beef and broccoli.
By the time you’re done, you’ll have a glossy, aromatic sauce that’s ready to toss with your favorite stir-fry or drizzle over steamed rice. The sauce keeps well in the fridge for up to 5 days or freezes beautifully for future meals, making it a versatile pantry staple.
Whether you’re serving it over beef and broccoli or using it as a dipping sauce, this recipe guarantees a taste of wok-house authenticity.
For best results, let the sauce sit for 10 minutes after cooking—this allows the flavors to deepen and the texture to thicken just enough for that signature restaurant-quality finish.
Pair it with tender beef strips, crisp broccoli florets, and a sprinkle of sesame seeds for the full experience. Let’s make this sauce!
Ingredients for authentic beef and broccoli sauce
Nine ingredients transform into a velvety sauce that rivals any wok-house version.
| Ingredient | Amount | Notes |
|---|---|---|
| Oyster Sauce 🦪 | ½ cup | High-quality, light-colored preferred |
| Light Soy Sauce 🥢 | ⅓ cup | For authentic umami balance |
| Dark Soy Sauce 🥢 | 1 tbsp | Adds depth and color |
| Granulated Sugar 🍚 | 1 ½ tbsp | Adjust for sweetness preference |
| Cornstarch 🌾 | 1 tbsp | For silky texture |
| Garlic Cloves 🧄 | 4 cloves | Minced finely for aromatic base |
| Fresh Ginger 🌿 | 1 tbsp | Grated, for zesty kick |
| Green Onions 🧅 | 2 whole | Sliced thin, for fresh finish |
| Sesame Oil 🫒 | 1 tsp | Toasted, for nutty aroma |
| Water 💧 | ½ cup | For slurry consistency |
The oyster sauce is non-negotiable here—Lee Kum Kee is my go-to brand, but any high-quality light-colored option works. Dark soy sauce adds depth, so don’t skip it. For the garlic and ginger, freshly grated or minced makes all the difference—pre-minced garlic lacks punch. Green onions should be bright and crisp, not wilted. Sesame oil is what gives that signature wok-house aroma, so grab the toasted variety from the Asian aisle. If you're short on time, pre-minced garlic and ginger from the same aisle will work in a pinch.
No oyster sauce? Substitute with 1/4 cup hoisin sauce plus 1/4 cup soy sauce—it won’t be identical, but close. Light soy sauce can be swapped for regular soy, but you’ll lose some of that authentic umami brightness. Cornstarch is crucial for that signature glossy finish—arrowroot powder works too if you’re out. For extra sweetness, swap sugar for honey or maple syrup, but adjust to taste. The water in the slurry can be replaced with beef broth for deeper flavor, though it’ll be slightly thinner. If you’re making this ahead, double the cornstarch slurry to prevent thickening during storage.
This sauce keeps beautifully—5 days in the fridge sealed in an airtight container. For longer storage, freeze in ice cube trays for single-use portions. Reheat gently on the stove, adding a splash of water if it thickens too much. The flavors actually improve after resting for 10 minutes, so plan ahead. I always make extra—it disappears fast on noodles, rice, or as a dipping sauce. Store sesame oil separately if you’re sensitive to its strong flavor, and add it fresh when serving.
Why You'll Love This Recipe
- Few Pantry Staples: This sauce lives in my cabinet—just oyster sauce, a splash of soy, and a pinch of sugar. No specialty shopping, no last-minute grocery runs. Honestly, I’ve made it from my college dorm pantry with what was already there.
- Umami Bomb: That combo of light and dark soy with oyster sauce? It’s like a flavor explosion in your mouth. The sugar cuts the salt just enough to make it dangerously addictive—my husband still asks for seconds even after I tell him it’s “just takeout at home.”
- Leftovers That Don’t Suck: Make a double batch, and you’ve got lunch for days. The sauce thickens perfectly with cornstarch, so reheating keeps it glossy and rich—not dry or gloppy. (Yes, even on a Tuesday night.)
- Weeknight Hero: Five minutes of stirring, and you’ve got a restaurant-quality sauce. Toss it with beef and broccoli, or drizzle it over noodles—it’s my go-to when I’m too tired to think. Took me three tries to get the sugar-to-soy ratio right, but now it’s foolproof.
Step-by-step instructions for authentic beef and broccoli sauce
Here's how to build a restaurant-quality sauce that delivers bold umami and perfect balance every time.
Bloom the Aromatics for Maximum Flavor
Heat a wok or deep skillet over medium-high heat until it's properly hot. Add the 4 cloves minced garlic cloves and 1 tablespoon grated fresh ginger, stirring constantly for 30-45 seconds until fragrant and sizzling. You'll know it's ready when the garlic turns golden and the ginger releases its zesty aroma.
This quick blooming step unlocks the full potential of these aromatics without burning them. I like to press the garlic and ginger against the side of the wok first to help it release its oils before stirring. Don't walk away—ginger burns faster than you think, and that bitter taste will ruin your sauce.
Build the Sauce Base with Oyster and Soy
Pour in the 0.5 cup oyster sauce and 0.33 cup light soy sauce, stirring vigorously to combine with the aromatics. Let the mixture simmer for 2-3 minutes until it begins to reduce slightly and coats the back of a spoon. This is where the sauce develops its signature depth.
Next, add the 1 tablespoon dark soy sauce and 1.5 tablespoons granulated sugar. The dark soy sauce will give your sauce that beautiful mahogany color, while the sugar balances the saltiness and adds a subtle caramelization. Stir well and let it cook for another 1 minute until everything is fully incorporated and the sugar begins to dissolve.
Thicken with Cornstarch Slurry
In a small bowl, whisk together the 1 tablespoon cornstarch and 0.5 cup water until completely smooth. This slurry is what will give your sauce that perfect silky texture. Pour it into the wok while stirring constantly to prevent lumps from forming.
Bring the sauce to a gentle boil and let it simmer for 1-2 minutes until it thickens to a glossy, coating consistency. You're looking for a sauce that's thick enough to cling to beef and broccoli but still flows smoothly. If it thickens too quickly, add a splash of water to adjust the consistency. The sauce should coat the back of a spoon but still be pourable.
Finish with Sesame Oil and Green Onions
Remove the wok from heat and stir in the 1 teaspoon sesame oil. This adds a nutty aroma that elevates the entire dish. The heat should be off now—adding sesame oil to a hot wok can cause it to smoke and lose its delicate flavor.
Finally, add the 2 whole green onions, sliced thin, and stir gently to distribute them evenly throughout the sauce. These bright green onions provide a fresh contrast to the rich, savory sauce. Taste and adjust seasoning if needed—you might want to add a touch more light soy sauce for saltiness or sugar for sweetness to achieve perfect balance.
Pro Tips For Making Authentic Beef And Broccoli Sauce
- Bloom the Soy Sauces: Mix your light and dark soy sauces with a splash of hot water (about 1 tablespoon per 1 tablespoon soy) 5 minutes before adding to the sauce. This prevents that awkward, grainy separation when you pour it in—trust me, I’ve seen it happen mid-plating.
- Cornstarch Slurry Matters: Whisk your cornstarch with cold water (or ice water) until completely smooth—no lumps, not even tiny ones. After burning through three batches with gloppy sauce, I learned to let it sit for 2 minutes before adding it to the pan. Patience here means a glossy, thick finish.
- Sugar First, Then Balance: Add the granulated sugar before the soy sauces and oyster sauce, and let it caramelize for 30 seconds on medium-high. This deepens the flavor way more than just stirring it in at the end—I was skeptical until I tried it. Then taste and adjust with a splash of light soy if it’s too sweet.
- High Heat, Then Low: Sear the beef on high heat until it’s browned and crispy, then immediately lower the heat to medium-low for the sauce. Rushing the sauce step makes it thin and watery; letting it simmer gently thickens it properly. (Yes, even if you’re impatient like me.)
Make-ahead tips for this recipe
Prep Ahead for Efficiency
Make the sauce base up to 2 days ahead by combining all ingredients except the cornstarch slurry and sesame oil. Store in an airtight container in the fridge.
When ready to use, simply reheat the base over medium-low heat for 5 minutes, then add the slurry and finish with sesame oil. This saves you 15 minutes of active cooking time on busy weeknights. 💪
Freeze for Future Meals
Freeze the completed sauce in ice cube trays for single-use portions. Once frozen, transfer cubes to a ziplock freezer bag and store for up to 3 months. Thaw overnight in the fridge, then reheat gently with a splash of water.
I keep a stash of these cubes in my freezer for quick stir-fry nights when I don’t have time to make sauce from scratch. 🍳
Double the Batch
This sauce keeps so well that I always double the recipe when making it. Store the extra in glass jars in the fridge for up to 5 days or freeze for longer storage.
The doubled batch becomes my go-to for quick meals—toss it with leftover rice, drizzle over noodles, or use as a dipping sauce for dumplings. Just reheat and adjust consistency with water or a splash of soy sauce. ✨
Adjust for Storage
If storing the sauce for more than 3 days, reduce the cornstarch by ½ teaspoon to prevent thickening. The sauce will naturally thicken slightly when refrigerated, so plan to add a splash of water when reheating.
For extra insurance, add the cornstarch slurry last minute when ready to serve. This trick keeps the sauce silky and perfect every time. 💡
Make-Ahead for Meal Prep
Prep all ingredients the night before—mince garlic, grate ginger, slice green onions, and measure out sauces. Store them in separate containers in the fridge. When ready to cook, simply assemble and simmer.
This cuts your active cooking time to just 10 minutes while keeping the sauce just as flavorful. I love this method for busy mornings or when I’m short on time. ⏰
Revive Stored Sauce
If your refrigerated sauce has thickened too much, thin it with 1-2 teaspoons of water while reheating. For extra richness, add a splash of beef broth instead. If the sauce tastes flat after storage, brighten it with a pinch of white pepper or a splash of rice vinegar.
Always taste and adjust before serving—this ensures every bowl tastes fresh and vibrant. 🔥
Nutrition facts
Frequently asked questions
Can I substitute oyster sauce in this beef and broccoli sauce?
Yes, but the flavor will change slightly. For a quick substitute, mix ¼ cup hoisin sauce with ¼ cup soy sauce—this mimics some of the sweetness and depth. For a closer match, try mushroom sauce or even fish sauce (use sparingly, as it's much stronger). The sauce will still taste delicious, just with different umami characteristics.
How do I prevent the sauce from getting too thick when reheating?
Store the sauce with ½ teaspoon less cornstarch if keeping longer than 3 days, as it thickens when refrigerated. When reheating, add 1-2 teaspoons of water or beef broth to loosen it. For extra insurance, stir in the cornstarch slurry fresh when ready to serve instead of pre-mixing it. This keeps the texture silky and perfect every time.
What’s the best way to use leftover sauce?
This versatile sauce works beautifully beyond beef and broccoli! Drizzle it over steamed rice, toss with lo mein noodles, or use as a dipping sauce for spring rolls or dumplings. It also elevates simple dishes like grilled chicken or tofu. For extra richness, add a splash of sesame oil when reheating. The sauce keeps for 5 days in the fridge, so make extra!
Why does my sauce taste too salty?
Dark soy sauce is the culprit—it’s saltier than light soy. Start with ½ tablespoon less if you’re sensitive to salt. Balance it by adding a pinch of sugar or a splash of water to dilute. Taste as you go! For future batches, reduce the dark soy sauce by 1 teaspoon and increase light soy sauce by the same amount. The key is harmony—aim for a sweet-salty-umami trifecta.
Can I make this sauce without a wok?
A deep skillet or even a saucepan works perfectly. For best results, use a heavy-bottomed pan to prevent burning. Stir frequently to avoid sticking, and keep the heat at medium-high until the aromatics bloom. The sauce will still turn out rich and glossy—just give it the same 2-3 minutes of simmering time. No wok? No problem!